
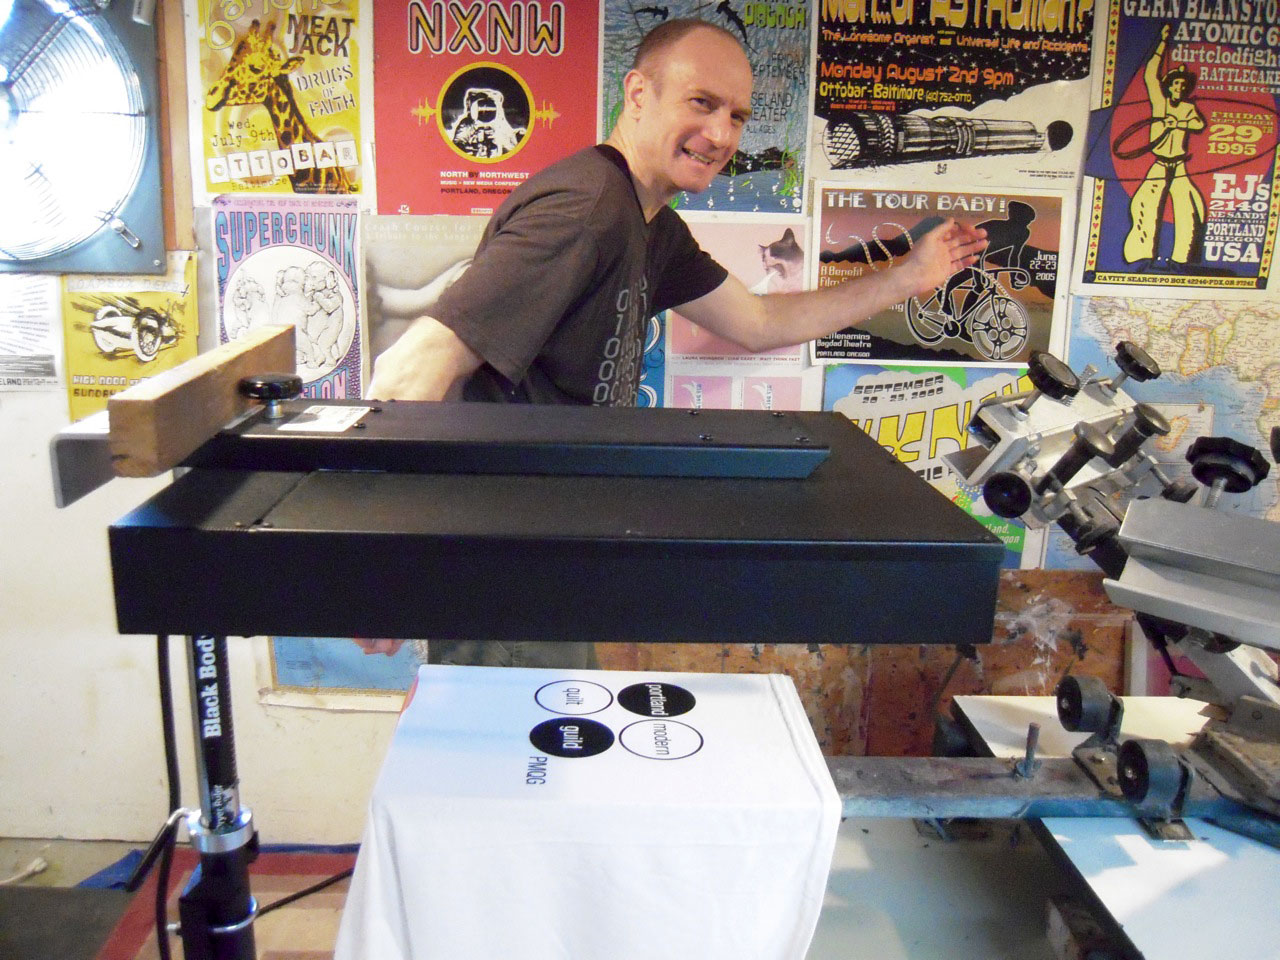
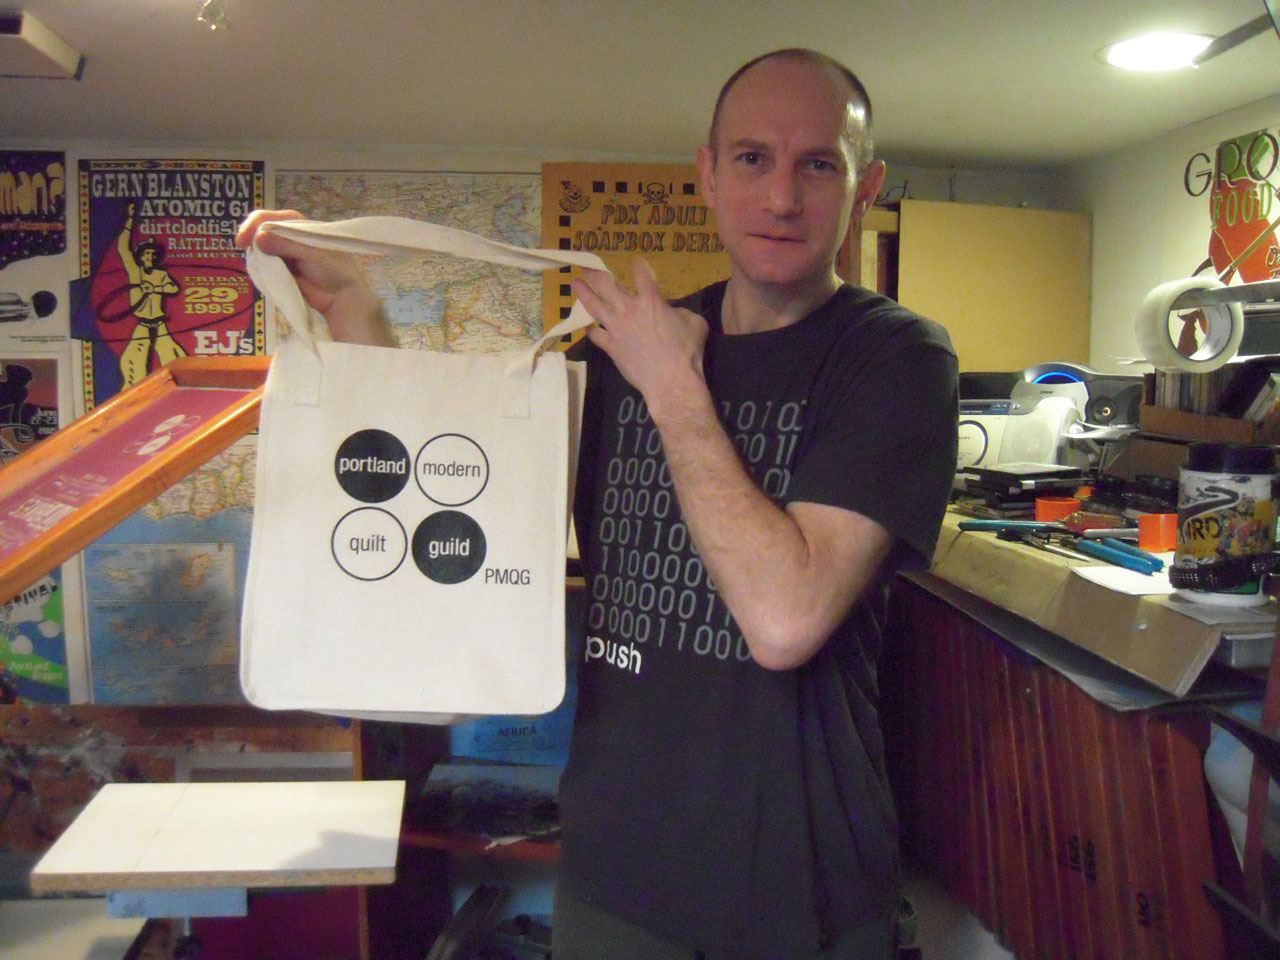
Who’s this guy? He is one of my most favorite people on this planet… he’s my husband and business partner, Gregg. We have a small screen printing business here in Portland called Phantom Chicken. Why do I have a picture of him here? Well, if you notice in the foreground, you will see a super fresh test print of the special PMQG design we are doing for the guild!
So I thought I’d dedicate this post to screen printing… to show exactly what it is and how it’s done.
Note: this has a few photos and is a little long, hopefully it will be informative!
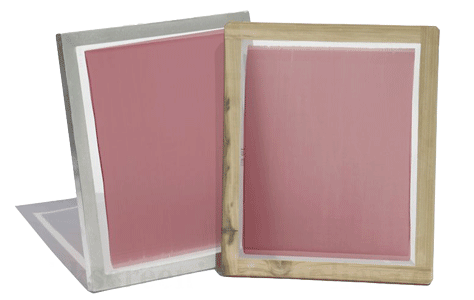
Basically it all starts with a screen. Like a window screen, but with monofilament fibers in a finer mesh:

This blank screen is coated with a photosensitive emulsion (looks red) in a dark room… then it’s ready to “shoot”:
In order to shoot a screen, you need a piece of film positive:
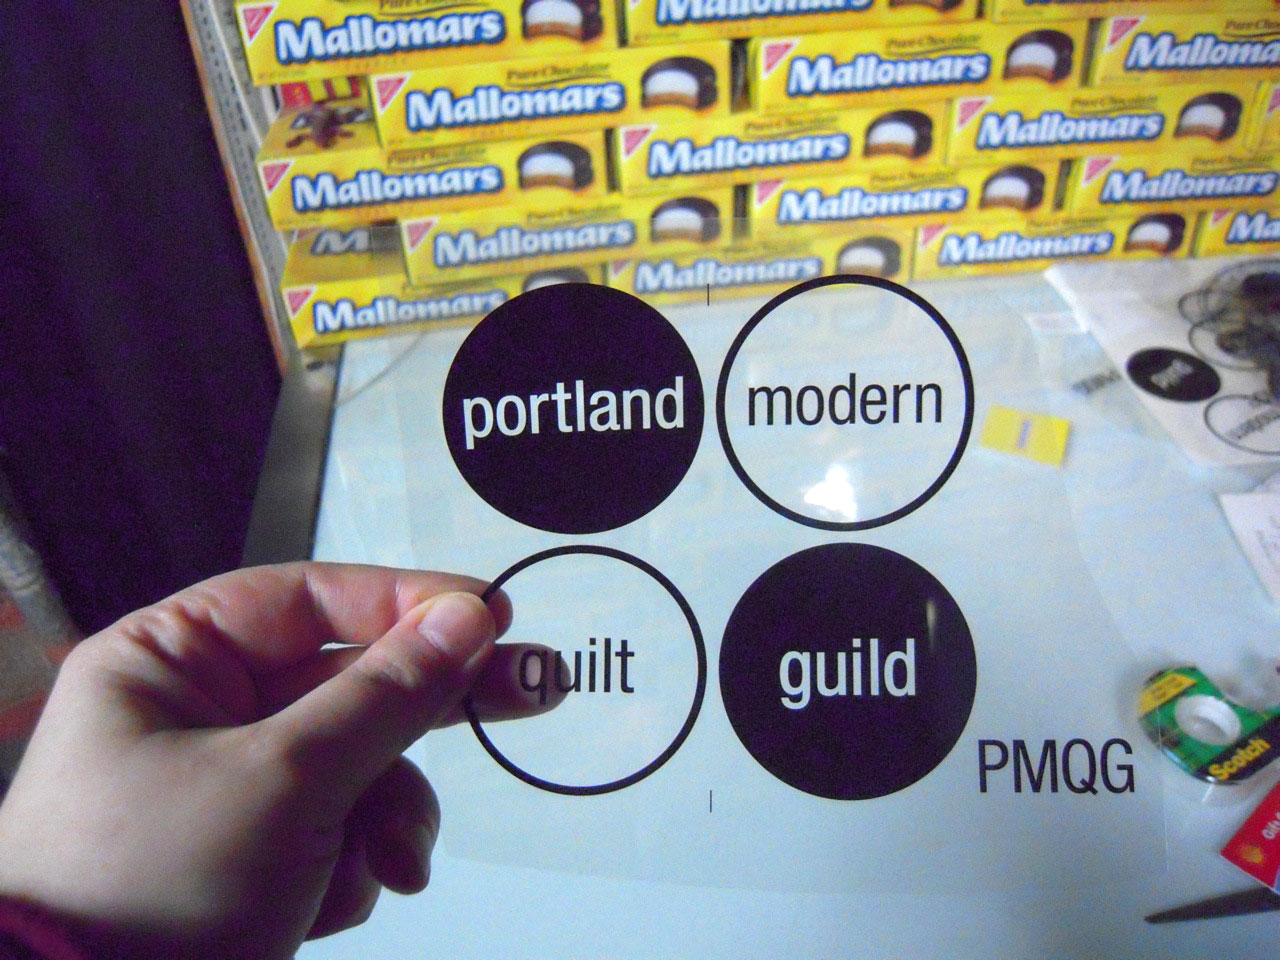
Here is one for the PMQG… you can see it’s black where you want the image to print and clear where you don’t want anything to print. (The Mallomars are another story altogether…)
We take this piece of film positive and put it on the coated screen in a darkroom and expose it to light for a few minutes. Where light hits the screen the emulsion hardens (clear areas) and everything else washes away (black areas).
What you have left is an exposed screen ready to use:
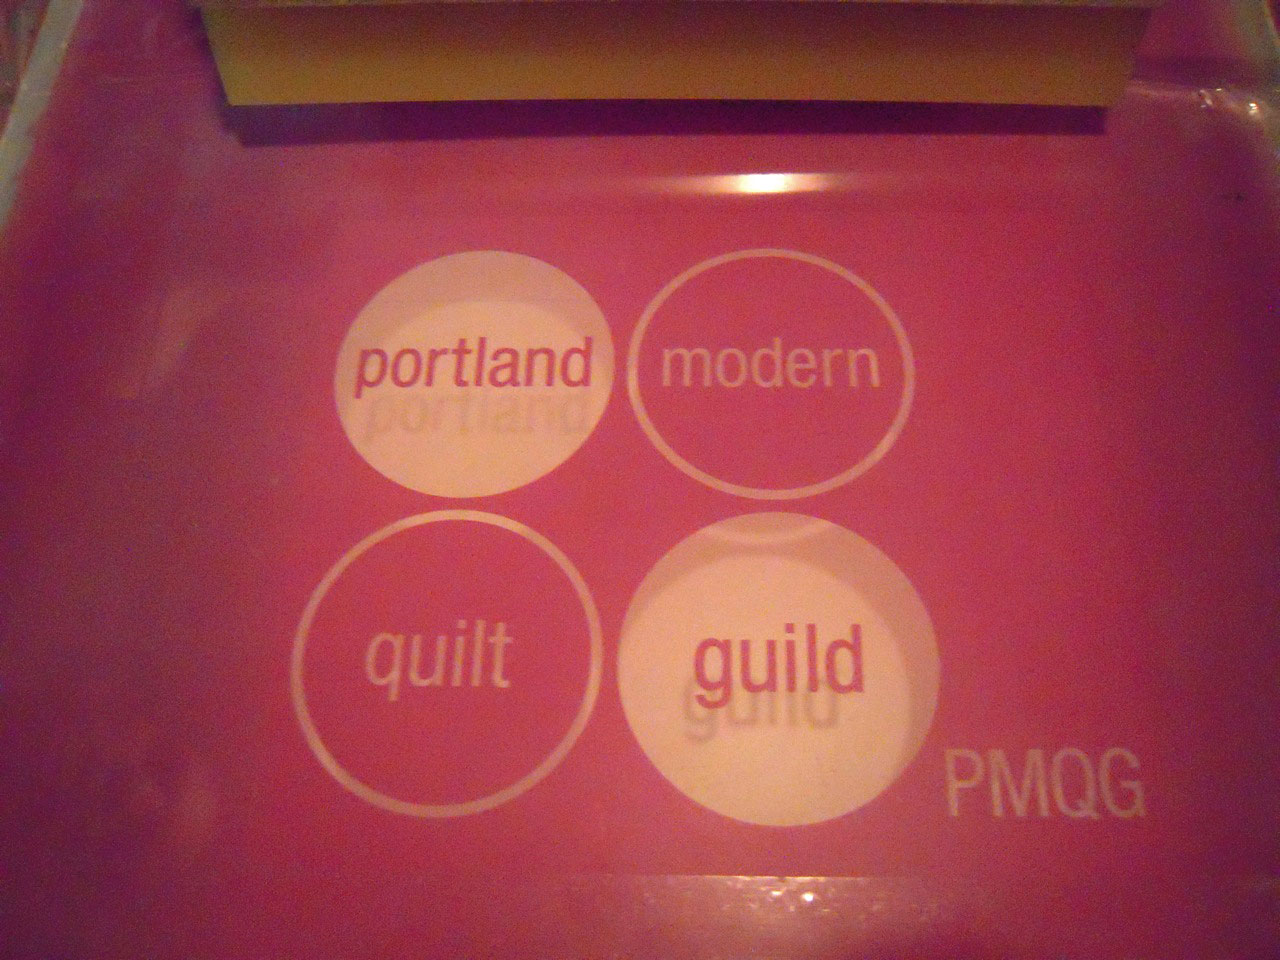
You can see how it is just like a stencil, with “holes” in which ink can go through. Then this screen is set up on press:
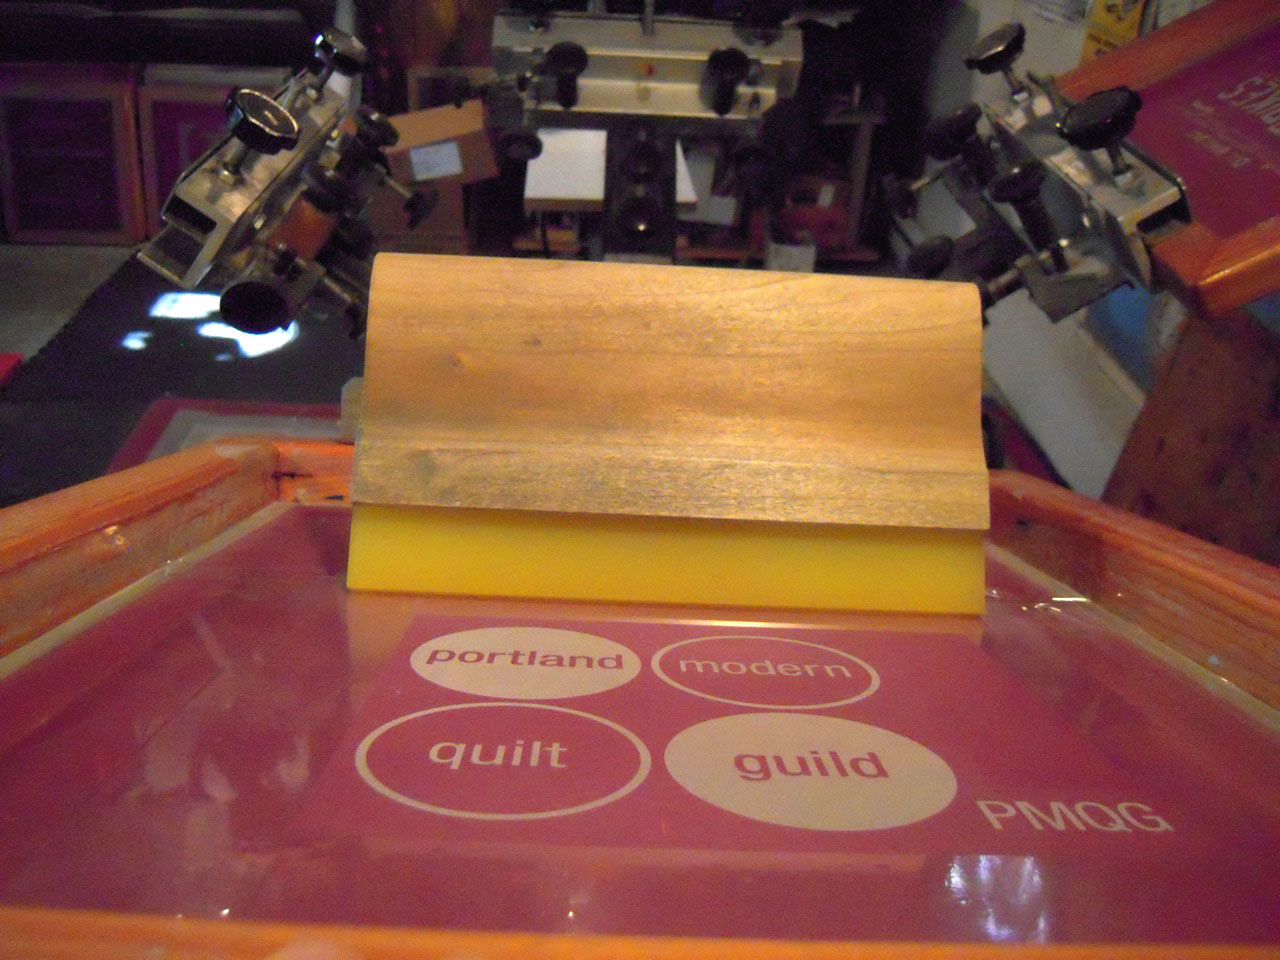
This is a 1-color image. If there were more colors in the print, each color would need a screen and be set up in registration so they all line up when printing.
Next we mix inks:
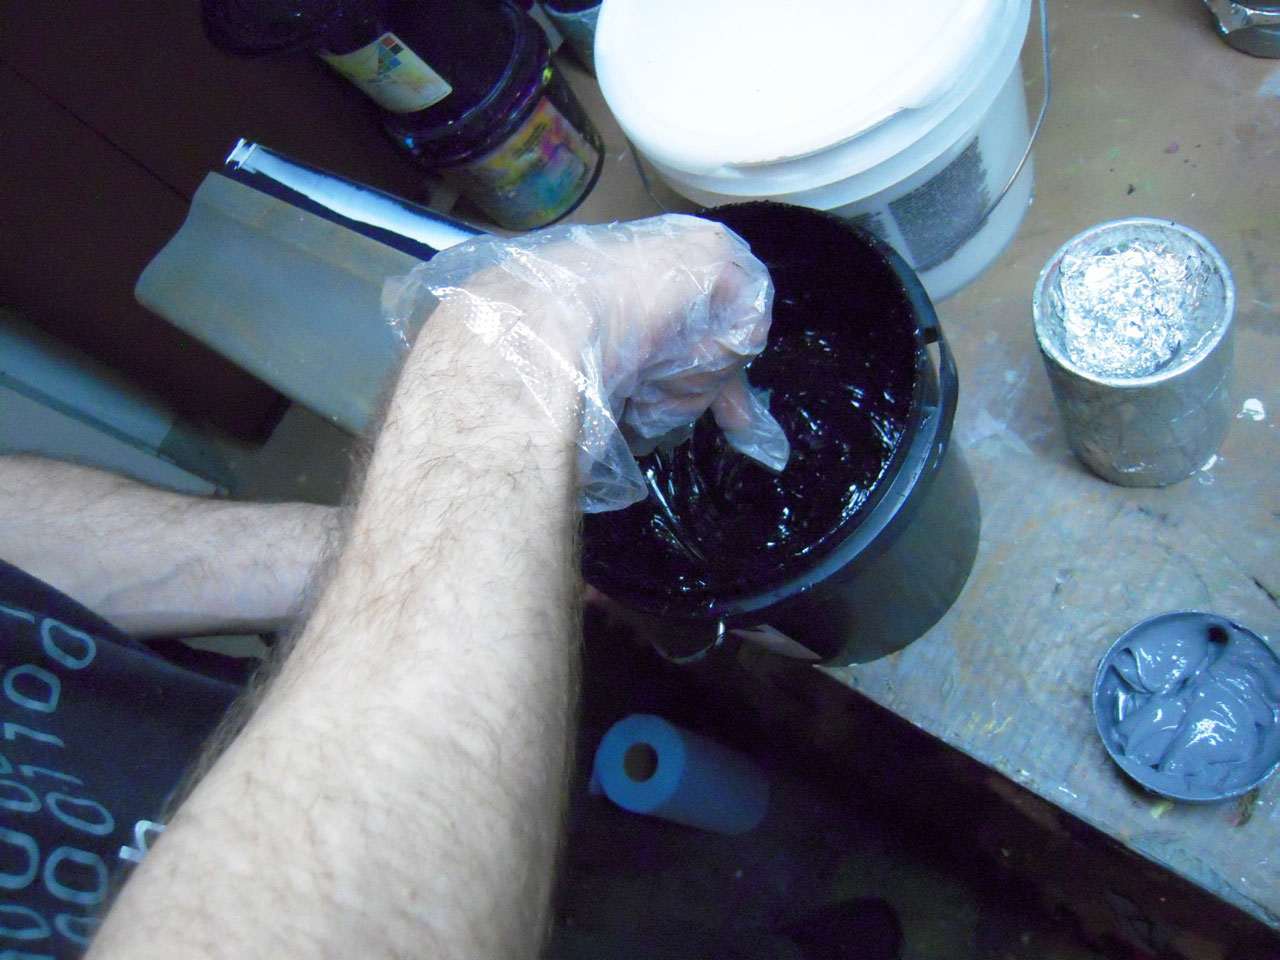
Here are our big cans of black and white inks, and a small tin of grey ink. We can mix any color a client would want to print. I’m actually pretty good at matching any color 😉
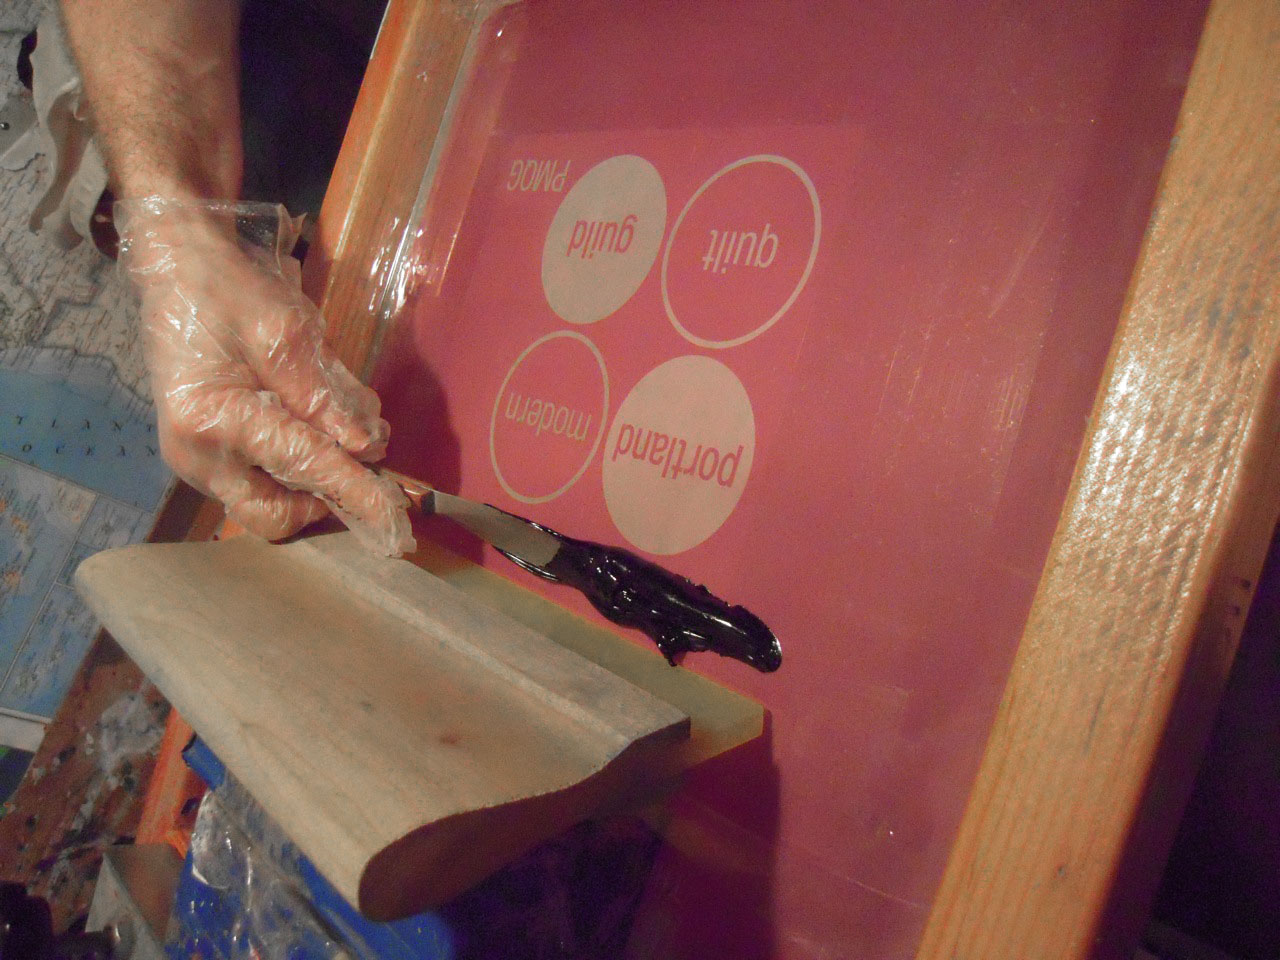
Then we put the ink on the screen. The ink is viscous and can sit for days without drying. This type of ink needs to be heat-cured for it to set.
Gregg then “floods” the screen with ink (filling the stencil with ink) then he loads the t-shirt or, in this case, tote bag on a platen:
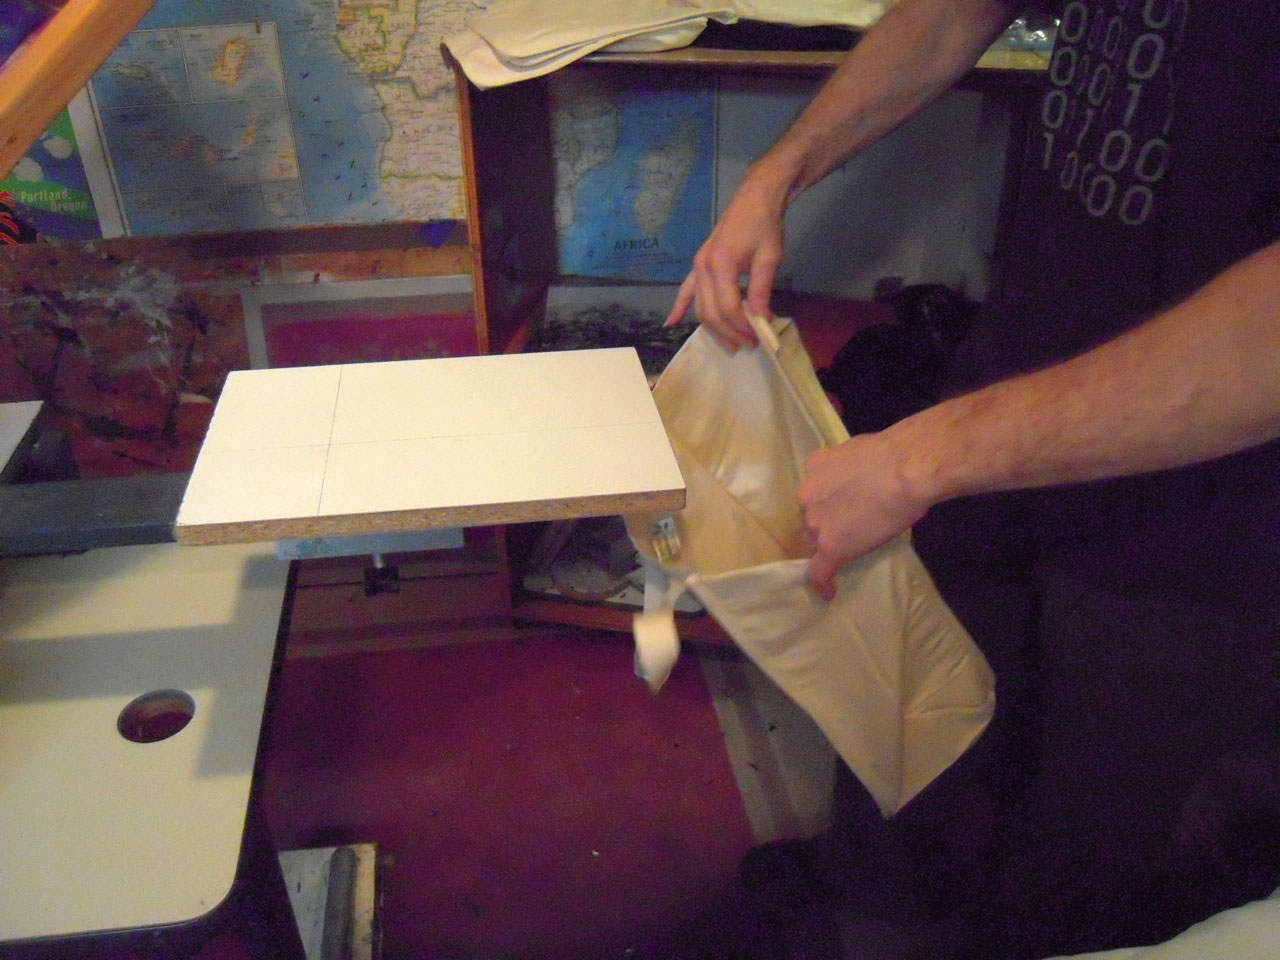
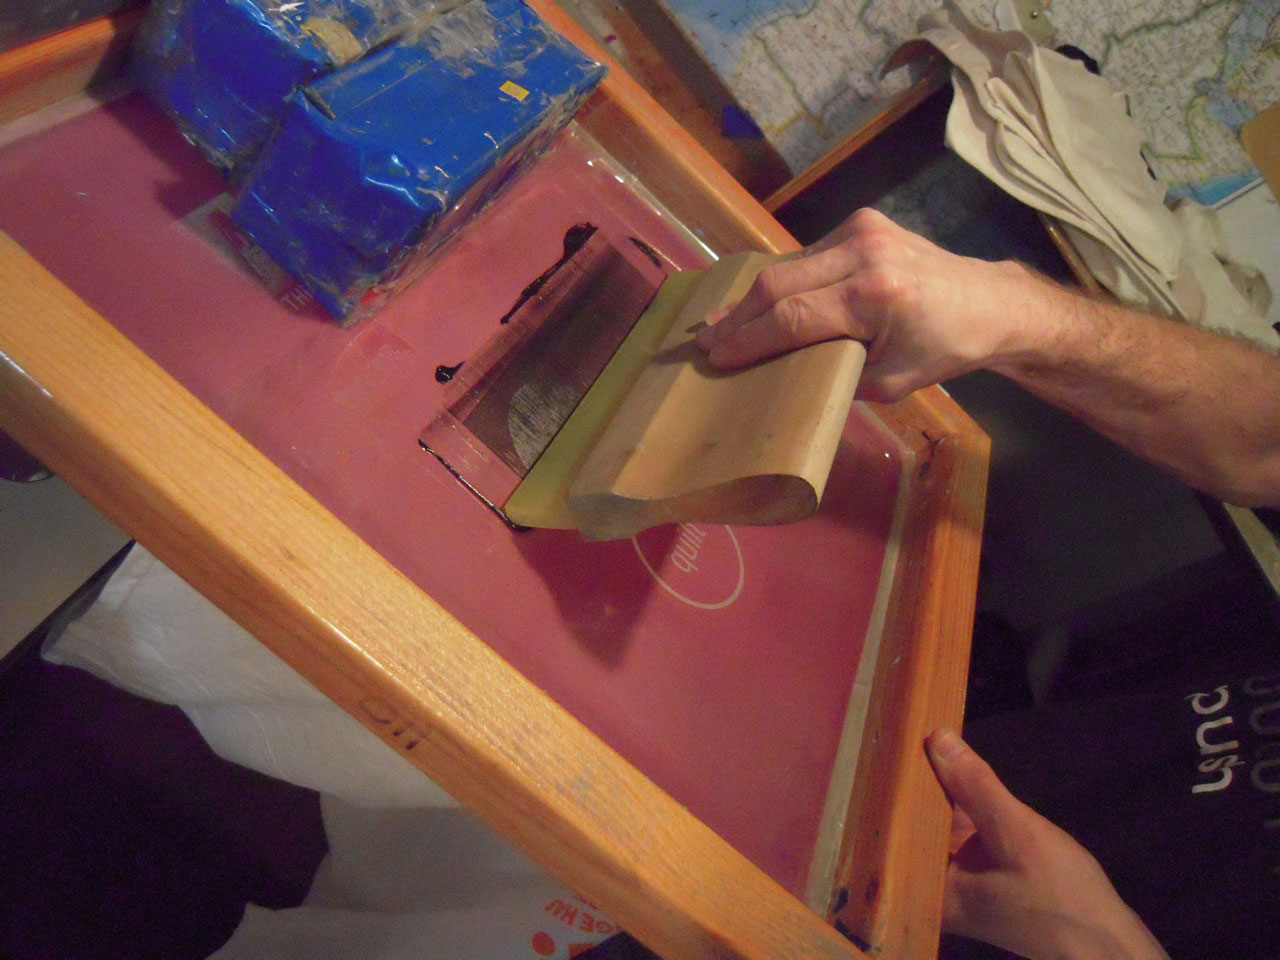
It needs to lie nice and flat so that the screen can lie on it evenly.
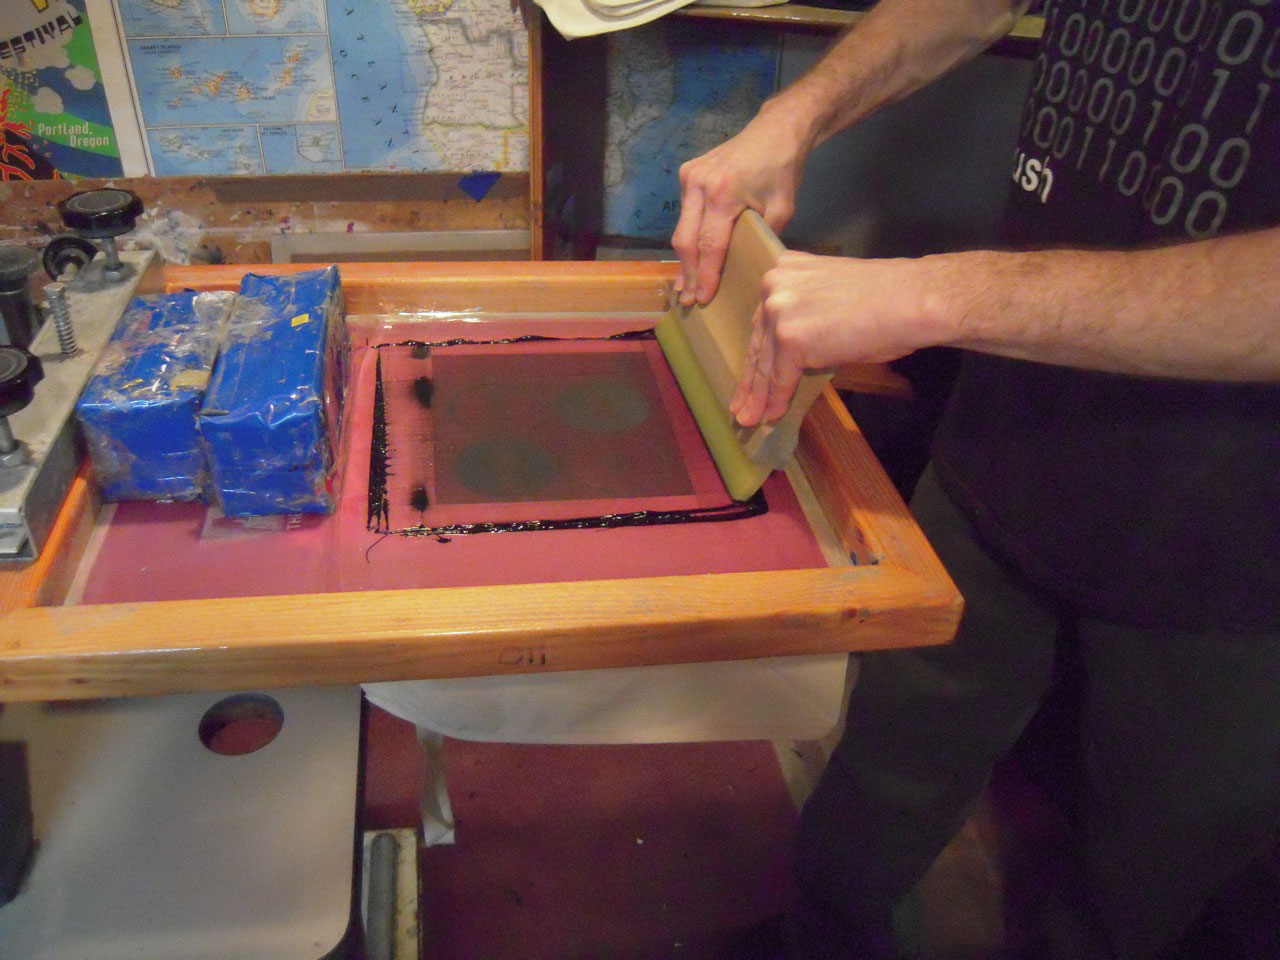
Then you pull the ink across the open areas of the screen pushing the ink onto the tote bag using a squeegee:
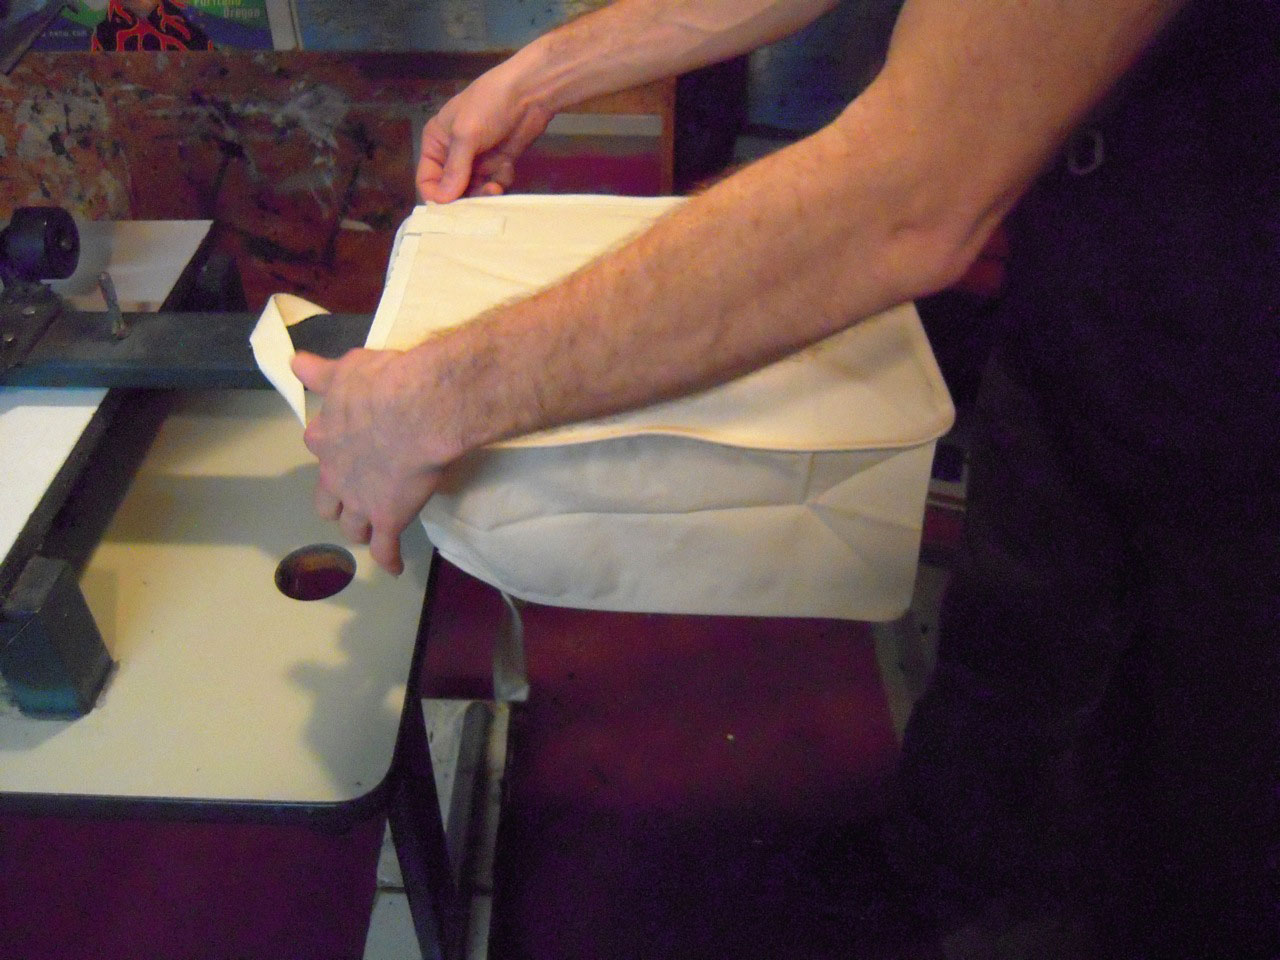
Once printed, the garment or tote needs to sit under the flash cure unit for a few seconds. The heat actually melts the ink so it grabs onto the fibers of the fabric:
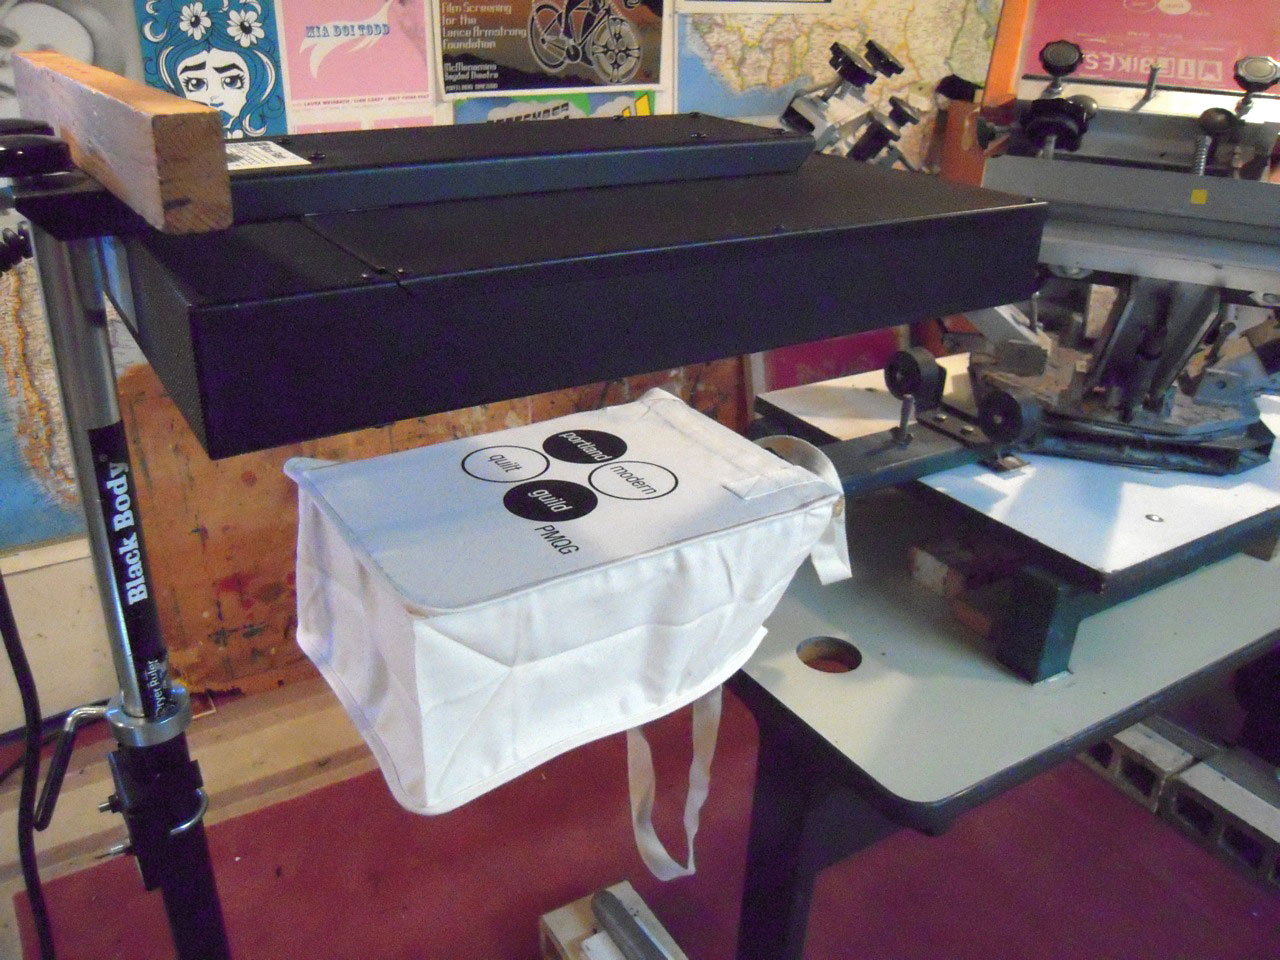
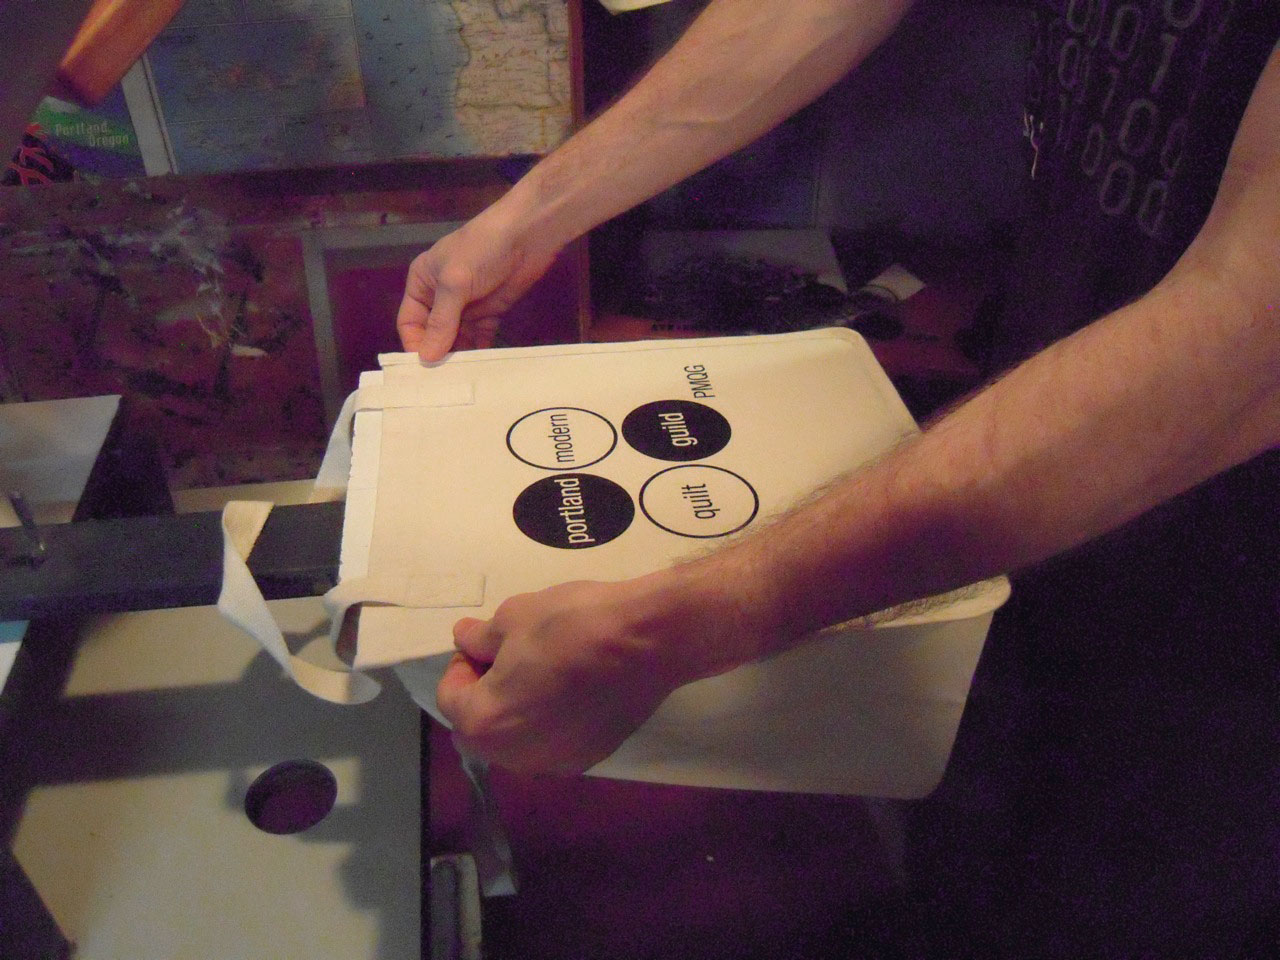
After that, voíla: a printed tote bag ready for use:
Once Gregg gets rolling, he can print 100’s of items in a day ~ Mr. Machine!
What’s really cool about this process is that it’s a very small version of how fabric is printed! Imagine these screens being about 8 feet tall by 5 wide set up on a HUGE automated press where they can set up to 22 colors at a time. If you look on your salveges, you’ll see different colored dots, those are all the colors (or screens) used in the printed design.
Drats, I forgot to order in time (though no QuiltCon for me, so it's not really time-sensitive). My biggest dilemma, what do I want?
I am excited about the PMQG stuff but also excited because I was just getting ready to look for a screen printer for some work I need done! Thanks for your post!