I’m sewing some hexies together for the center of the Heart Chakra quilt project I’m currently working on. I’ve sewn a few whole quilts with hexies and I’m going to share with you how I sew my hexies together without any stitching showing on the front.
To start, these are the notions I use:
- Needle: John James #12 Sharp
- Small Scissor
- Superior Kimono Silk Thread #100
- Thimble
- Thread Heaven (thread conditioner)
I’m starting with basted hexies. If you would like to see how I baste my hexies, please go here , or here for a full hexie tutorial. Be ready for lots of photos!
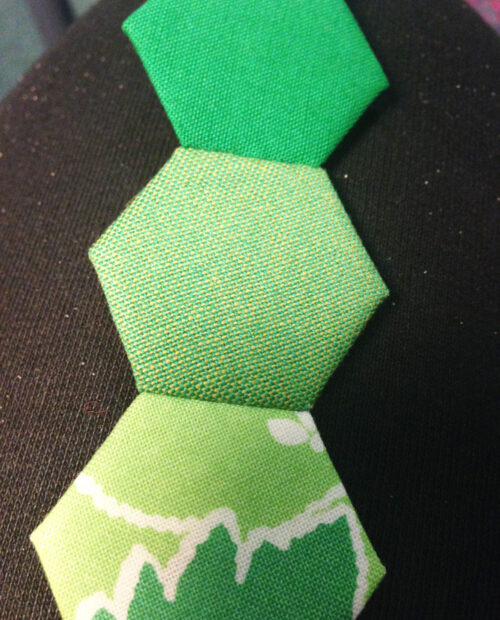
I start by laying out my hexies exactly how I’m going to sew them together. This layout is small, so it’s easy to layout just about anywhere. Sometimes I use a card table with batting stretched on top and taped down to layout hexies – the batting keeps them in place a little better.

Stitching Pieces into Rows
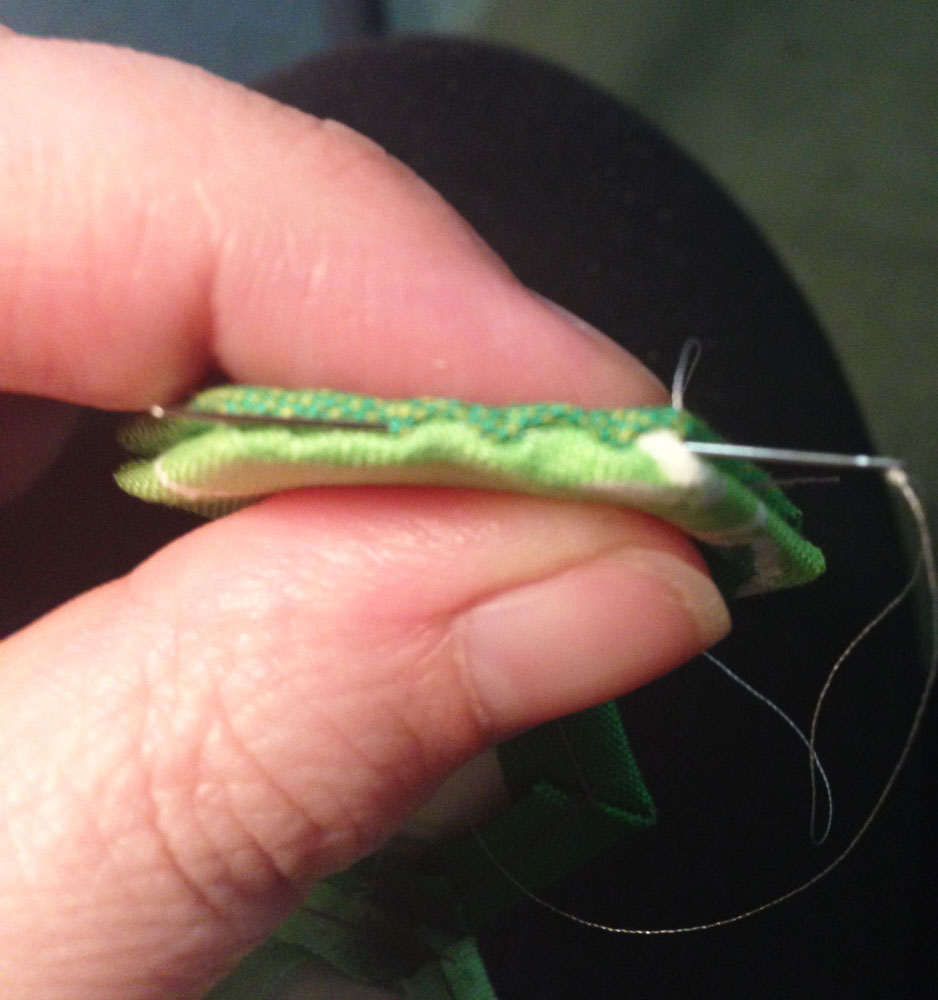
I then sew my hexies together in rows. I start by knotting my thread with a quilters knot and pulling it up through my first hexie in the center. I personally think that sewing them with WRONG sides together gives the best results. I use a ladder stitch and sew to one end:
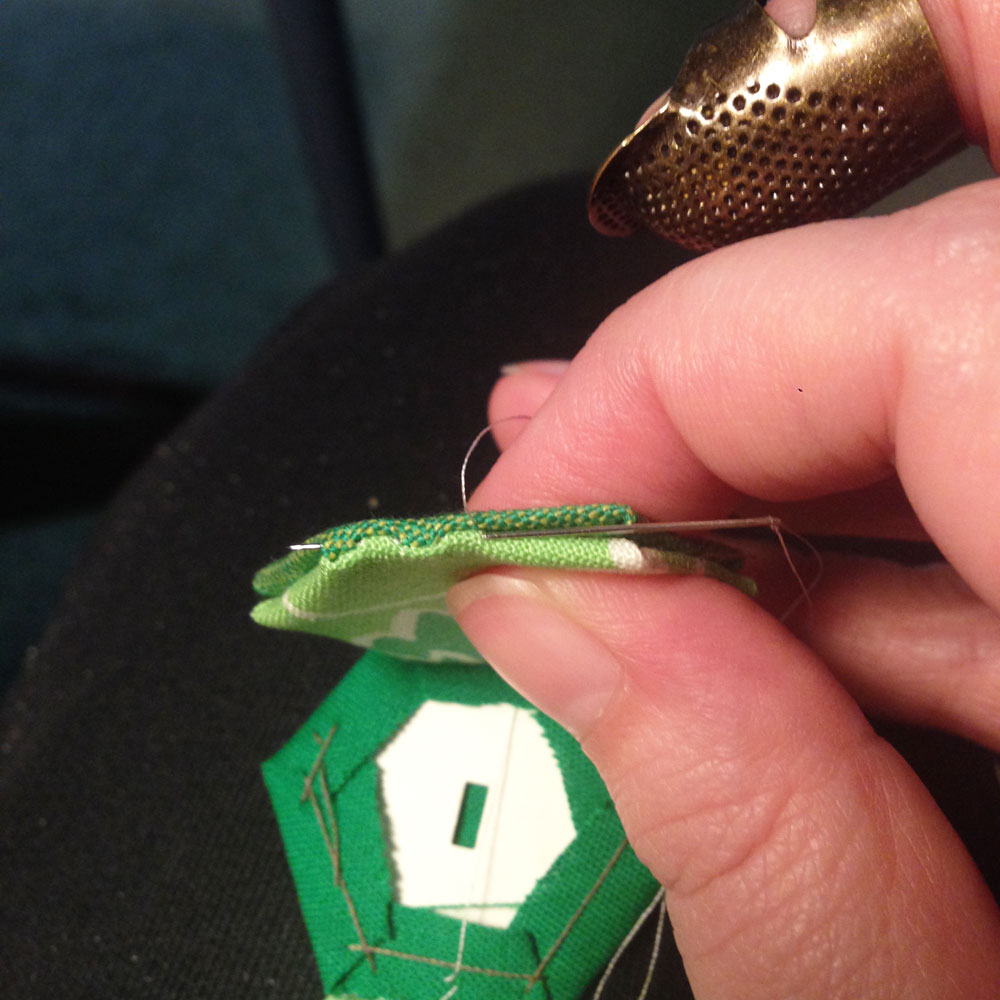
Then I flip the hexies in my hand and stitch back into the center:
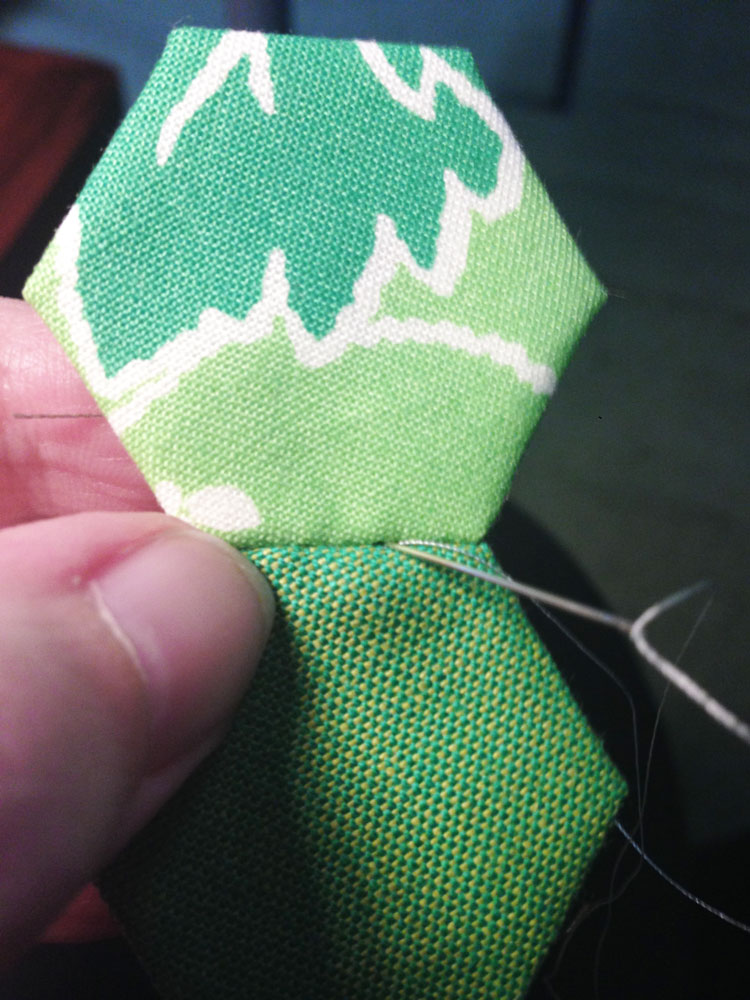
Keep going… ladder stitch all the way to the other end.
Flip the hexies in your hand again, and sew back to the centerpoint.
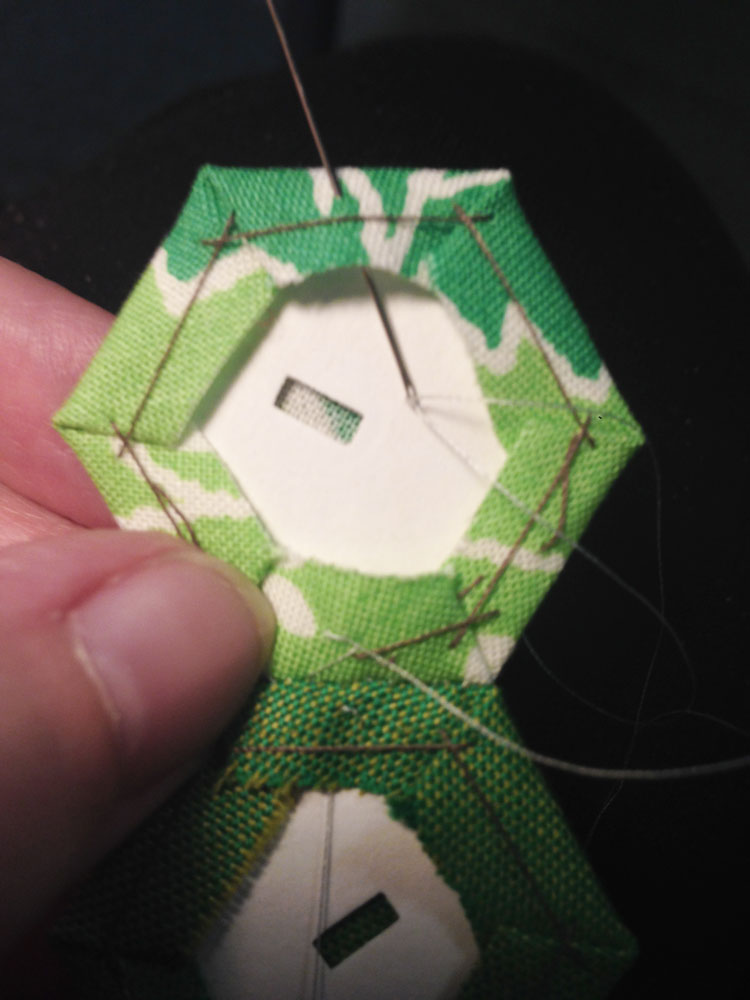
Yes… this doubles the stitching. It may be overkill, but I like to use my quilts and I wash them as any other thing I own, so they have to be durable.
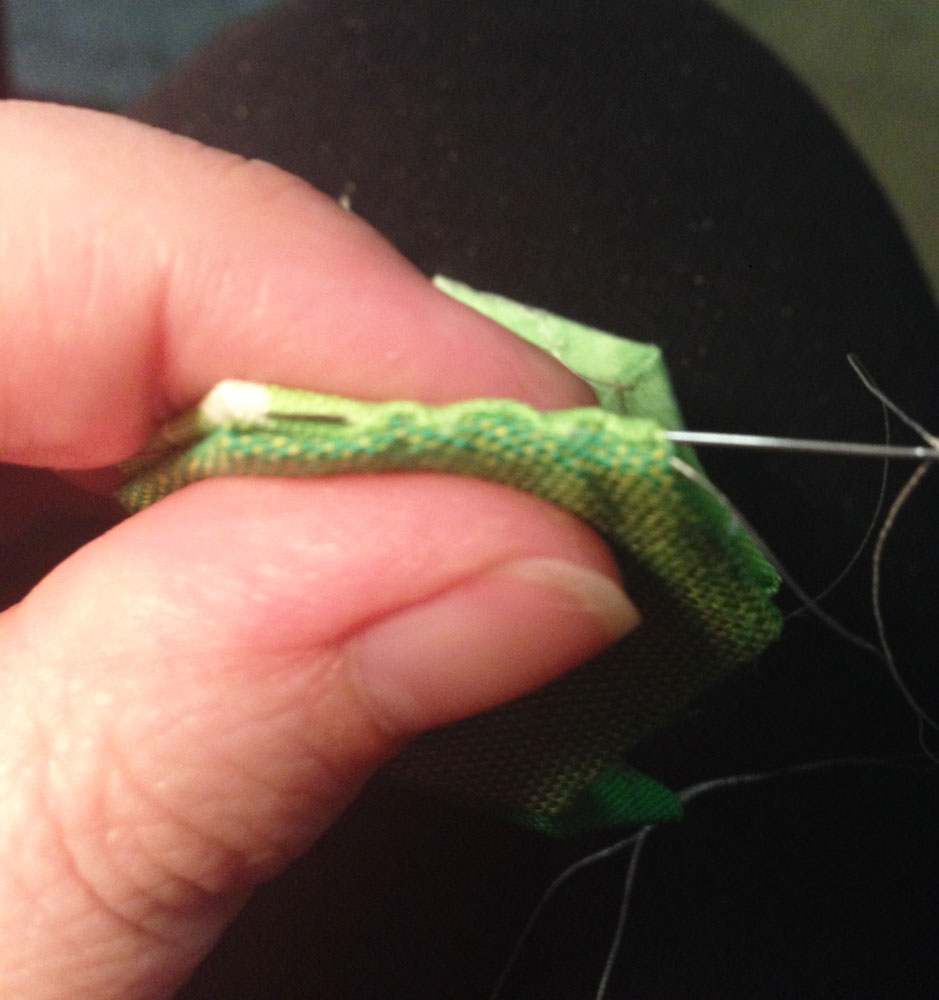
Open the hexies and push the needle through to the back. The trick here is to avoid catching any fabric on the pass-through. If you do, you may see the stitch on top.
Continue On
Knot on the back side, close to where the needle came out. After knotting, slide the needle up to the next side to be sewn.
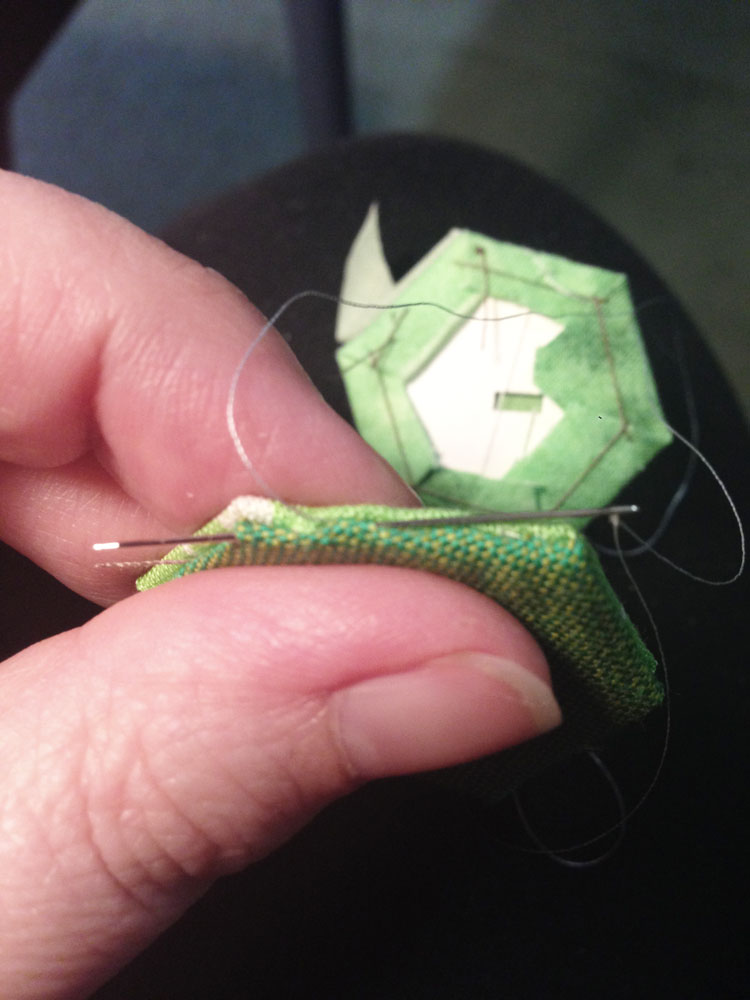
Knot here – one more time – this ensures that if a thread is cut anywhere, it will not unravel all your stitching. Pass the needle up through the center of the hexie, right on the edge.
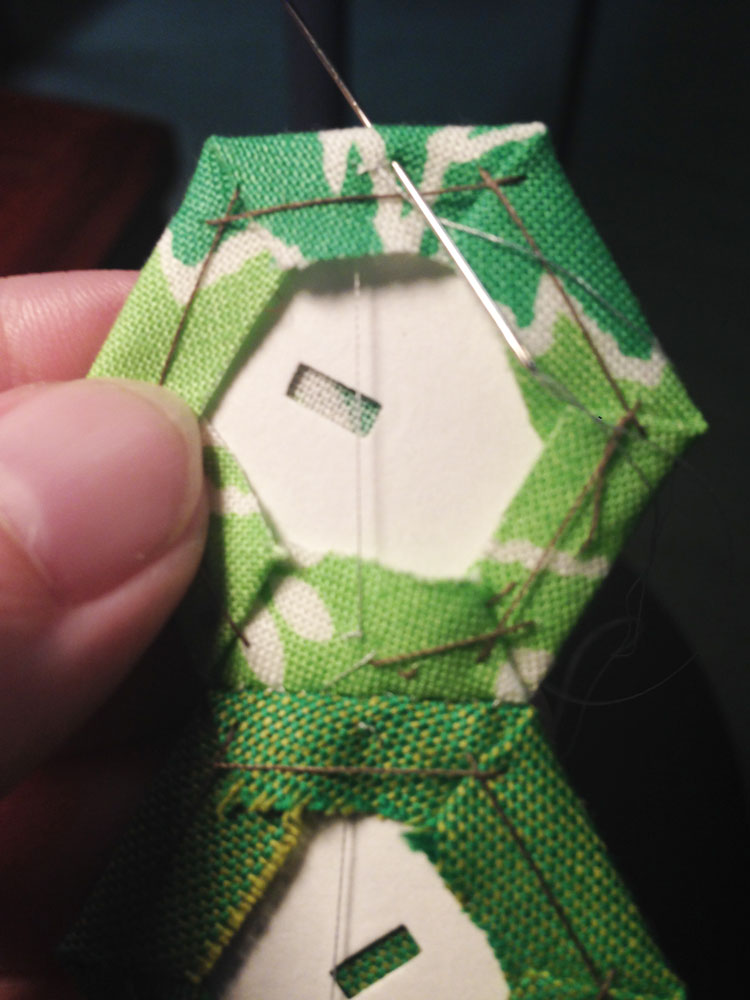
Start your next hexie – just as before: ladder stitch to one end… and follow all steps again.

You can see that when you open your hexies after sewing this way, you don’t see any stitches on the outside of your work!

The running threads from one hexie to the next can be snipped when removing the hexie papers, or they can stay in place and you can pull the papers out around them.
Once I have all my rows sewn up, I sew them together using a whip stitch. I’ll do another tutorial on that as soon as I get there with this project.
Happy Hexies!