There are many steps and procedures to making an English Paper-Pieced (EPP) project. Since I’m a hexie addict, I thought I’d share a little about my process.
**I should mention: I’m a self taught graphic designer and beginning quilter with a passion for hexies and color. While I’m creating, I don’t worry about how I’m “supposed to” do things, or the quilt police. I just do things the way that works best for me until I’m shown something better. You may already know way more than I do… and that’s okay.**
DESIGN:
Most people think of the Grandmothers Flower Garden design when they think of hexagons. It’s a great place to start They make beautiful quilts, and you don’t have to think too much about the design until you are sewing the actual “flowers” together.
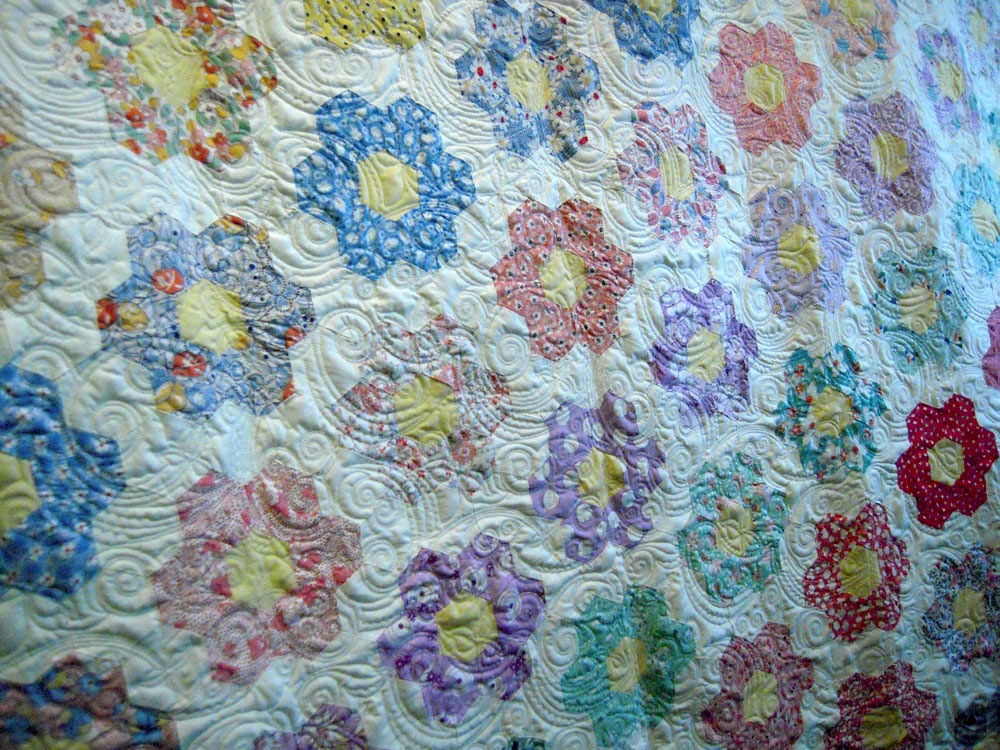
Personally, I love the idea of quilts with more of an iconic design and bright colors, almost like a show poster. When I was shown how to make hexies for the first time at a PMQG meeting in 2010, I finally realized a way to create the type of quilts I wanted to make.
I use Adobe Illustrator to design my quilts. It’s a great program, but sometimes I wish I used a program that figured out your fabric requirements for you.
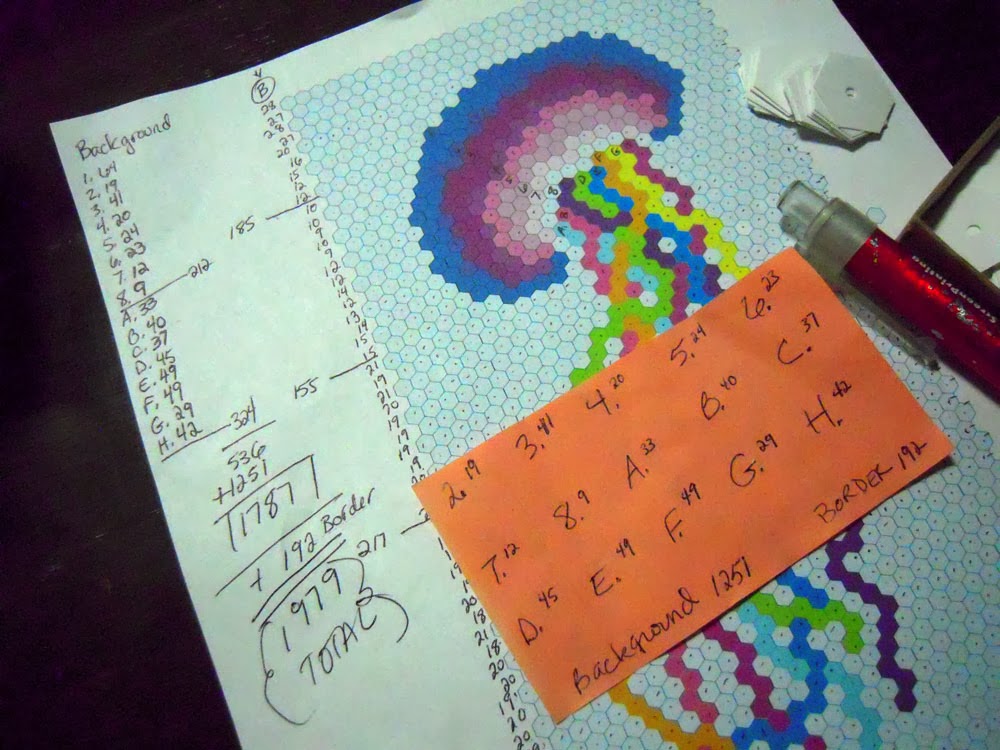
In Illustrator, I work with color to differentiate between colorways… but I may not use the same colors in fabric as the design illustrates. I create the design in actual size on the computer so I know how big it will be. The image size is reduced to fit on a sheet of paper and I print it out, and that becomes my pattern. I name each colorway, and count how many hexies are in it.
Preparation
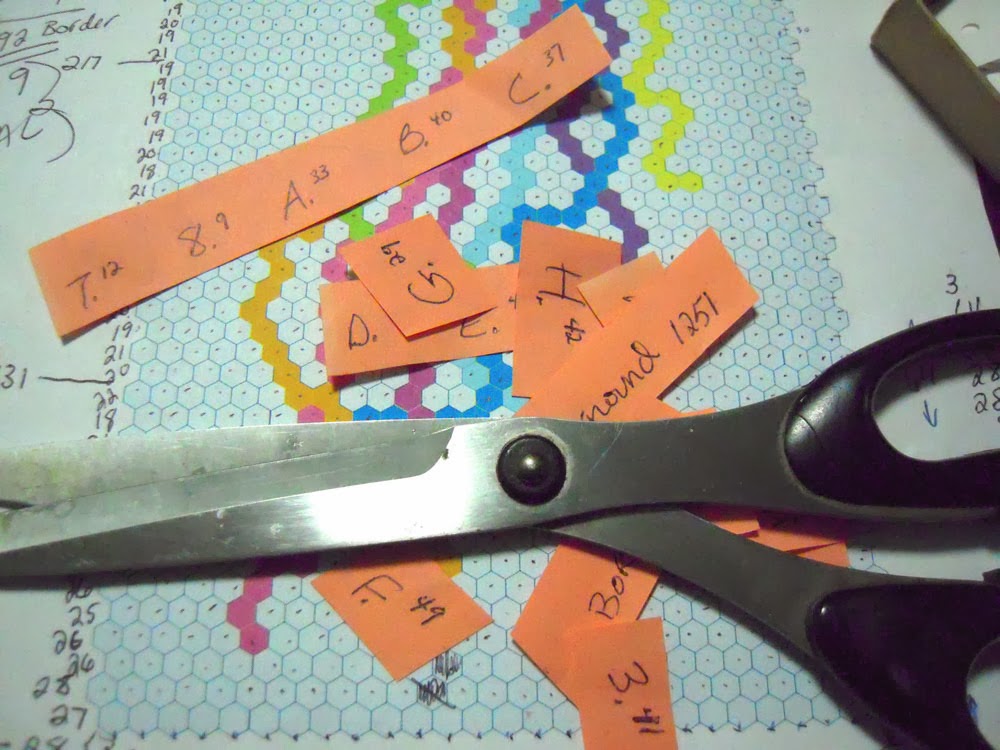
As you can see, I labeled my colors: 1, 2, 3, 4, 5, 6, 7, 8, A, B, C, D, E, F, G, H plus the background color, and a border color (which is not represented on my pattern). I counted how many hexies for each color way and wrote them down on a piece of paper, cut them up and put in individual baggies ready to collect hexies in that colorway
Once I have my counts, I get my hexies out. Before I do ANY sewing, I take the time to punch a hole in each hexie. This step is very important! It will save you so much time when you are done with your quilt top and need to take these papers out. I use paper pieces from Paperpieces.com. It is worth the money to have exact sized pre-made hexagaons! I only wish they came with a pre -punched hole.
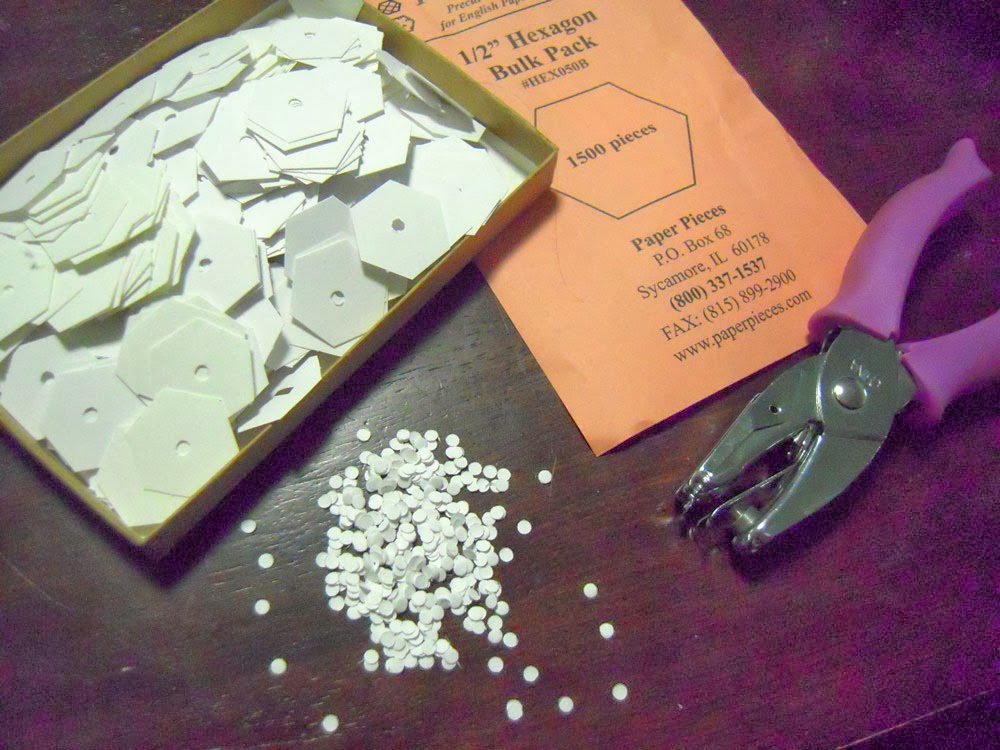
I’ve never used plastic templates or cut them myself from old cardstock. I know some have had great experience with this… but not me. Seems to take way too much time.
Layout
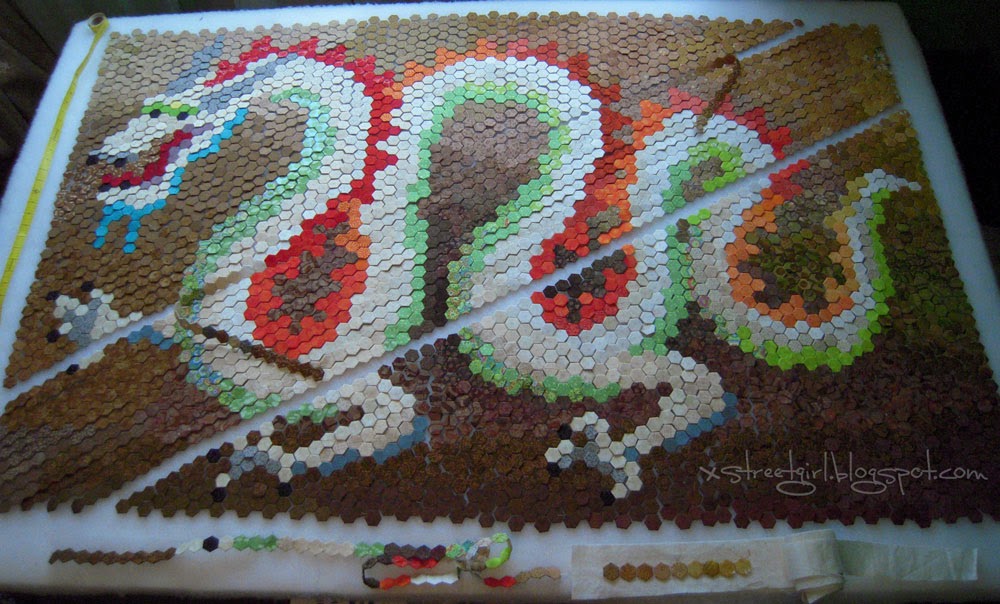
The last thing I do to get ready is to prep a layout board. You can use a design board (rigid foam insulation covered with batting that rolls over to the back and is taped to the backside). Use the table to hold your hexies for layout before sewing them together. The board should be bigger than your finished quilt size. When I laid out the Dragon quilt, I used a 4’x6′ board which was just barely enough space to work within.
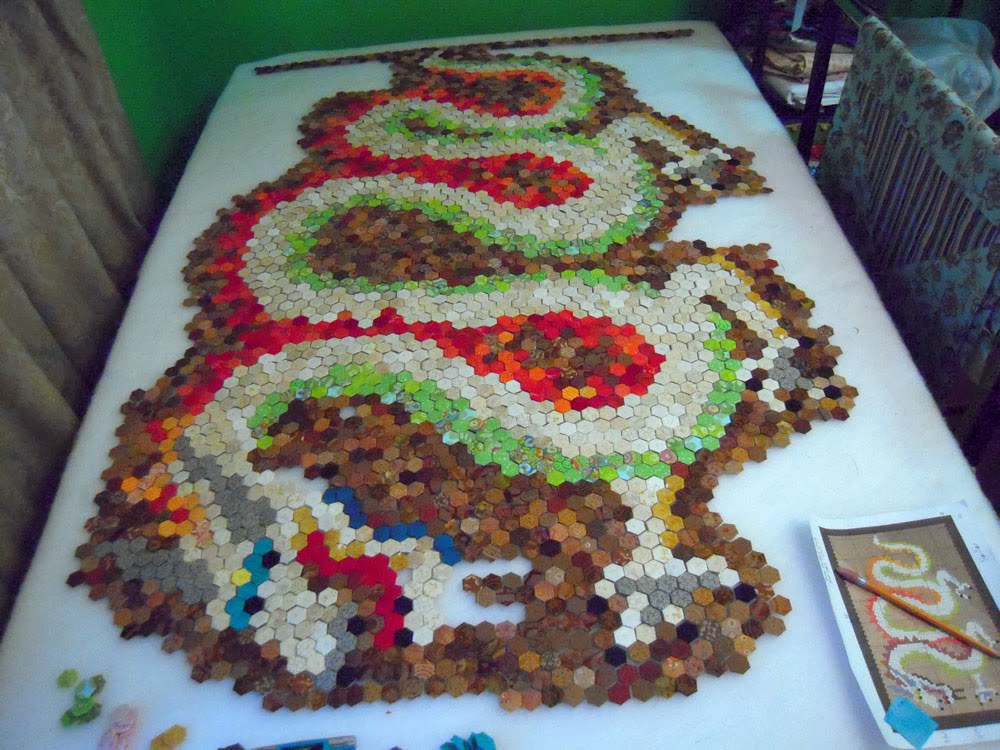
This board will need to find a good flat home for as long as you are sewing this quilt together. I was lucky enough to have the space in the corner of my sewing room. While I was sewing it together, I was very limited in what I could do in my workspace. The Jellyfish I’m currently working on will be about 2’x4′, much smaller, but still tough to find space for it. It’s an issue I’m still pondering.
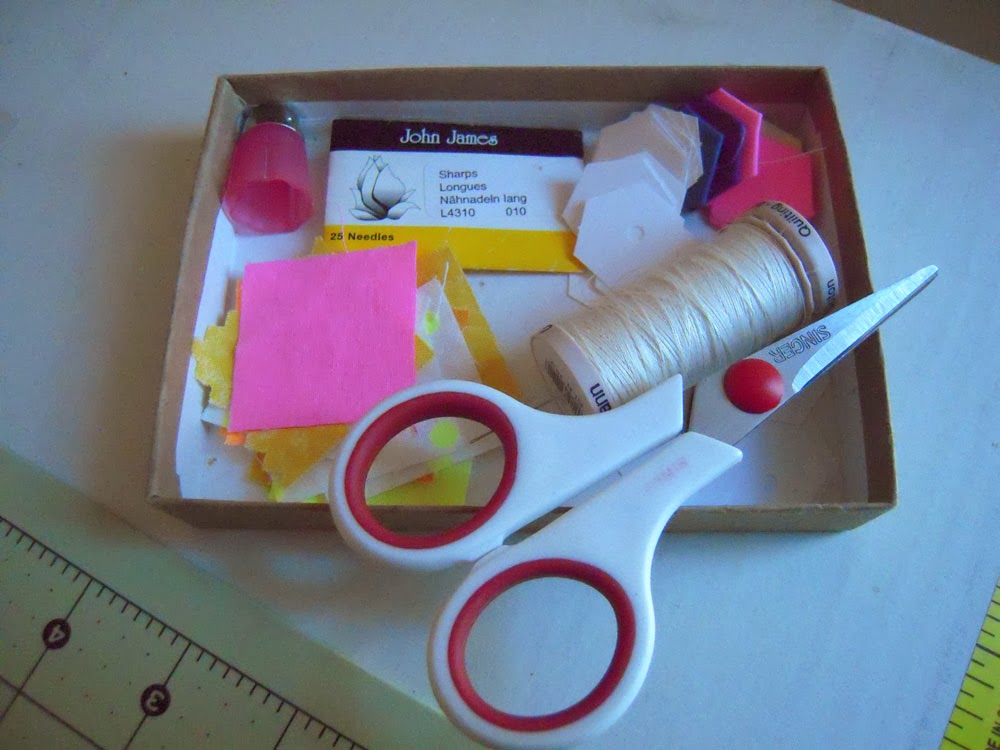
Notions
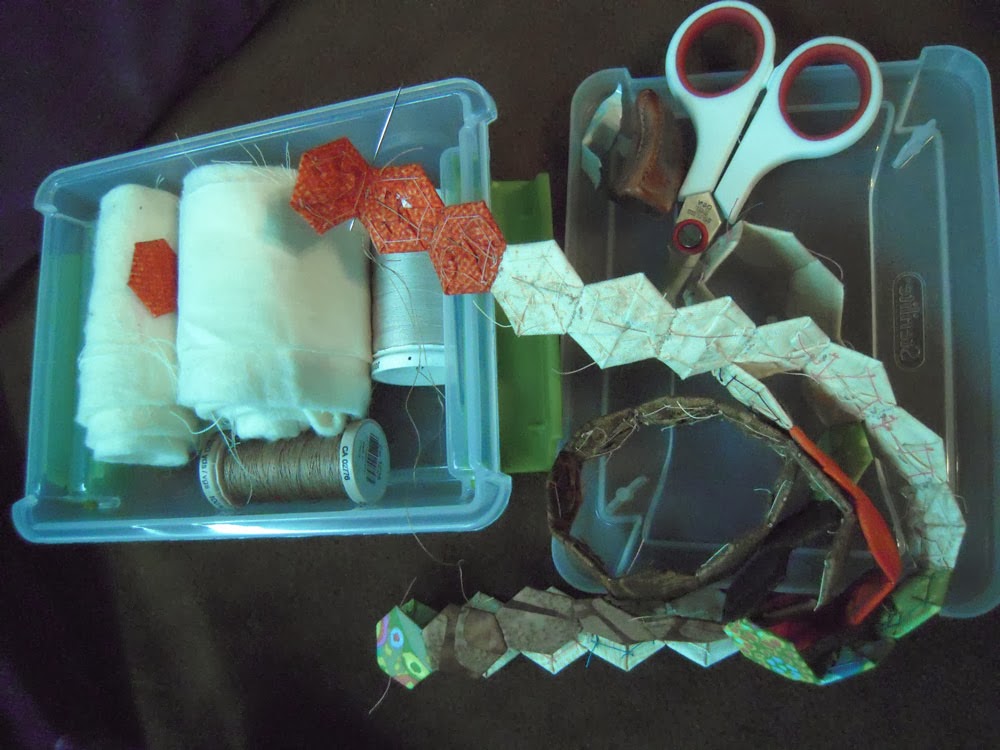
Once you have your board ready, design done, and hexie pieces prepped, it’s time to put a sewing kit together! You’ll want something that can hold 50 finished paper pieces (you have to work hard to make that many in a day), a small scissors, a whole package of needles, a thimble, a spool of thread, and space for 50 fabric squares.
Making each hexie
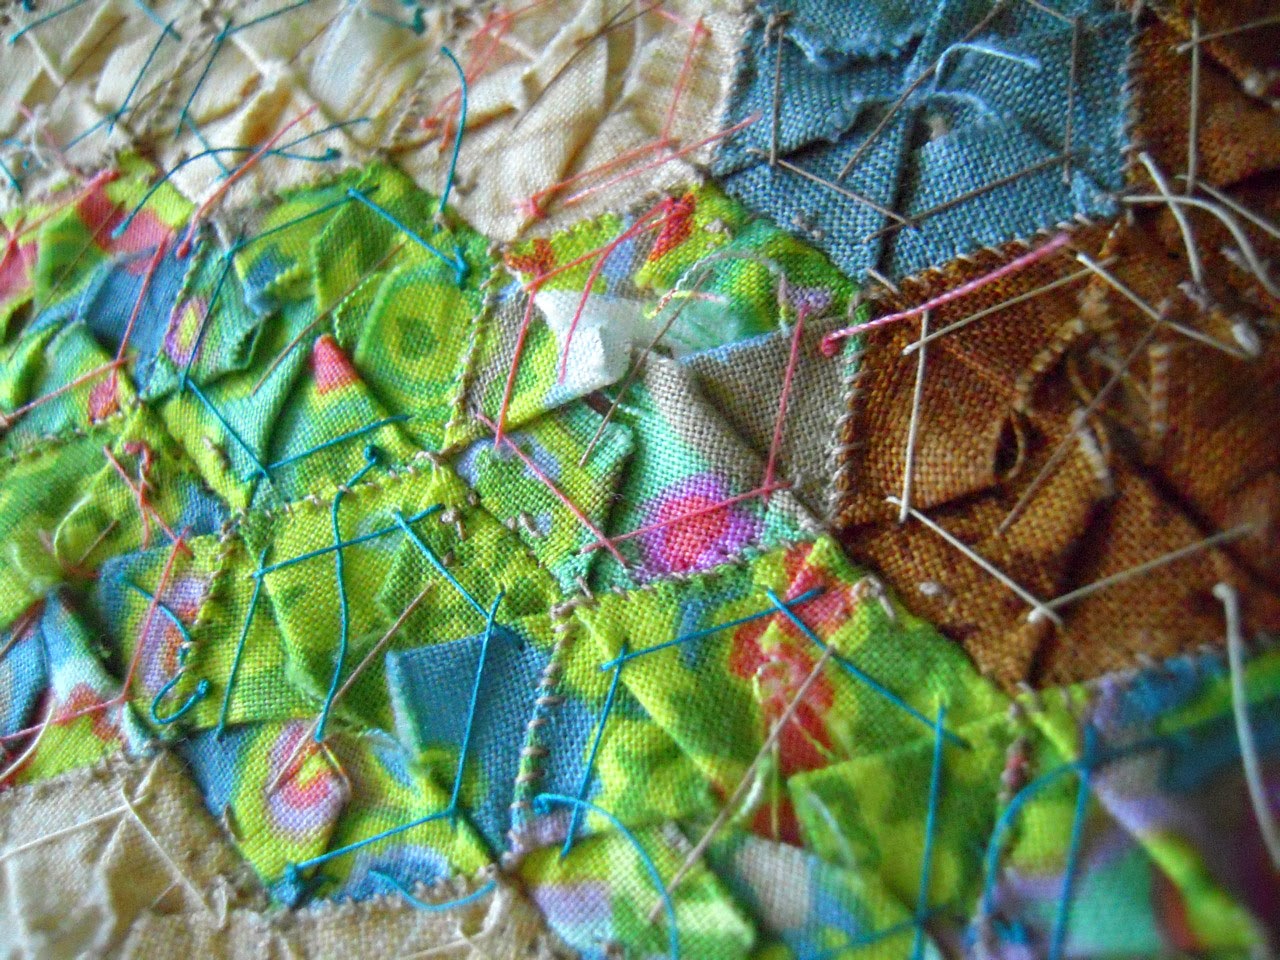
For the 1/2″ hexies, I prefer 1.5″ squares of fabric instead of an actual hexie shape with a 1/4″ seam allowance. It’s much faster to cut the fabric pieces that way, and I like how they bulk up (after being quilted) with the extra layer of fabric on the backside of the hexie
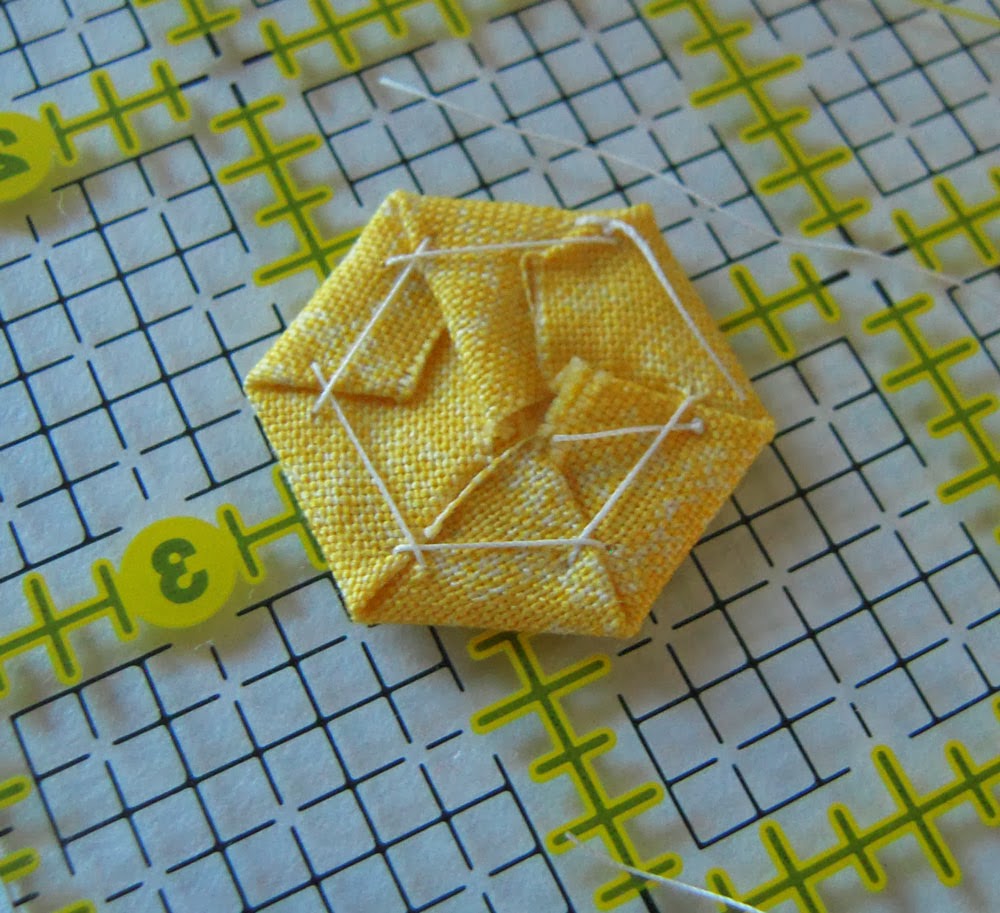
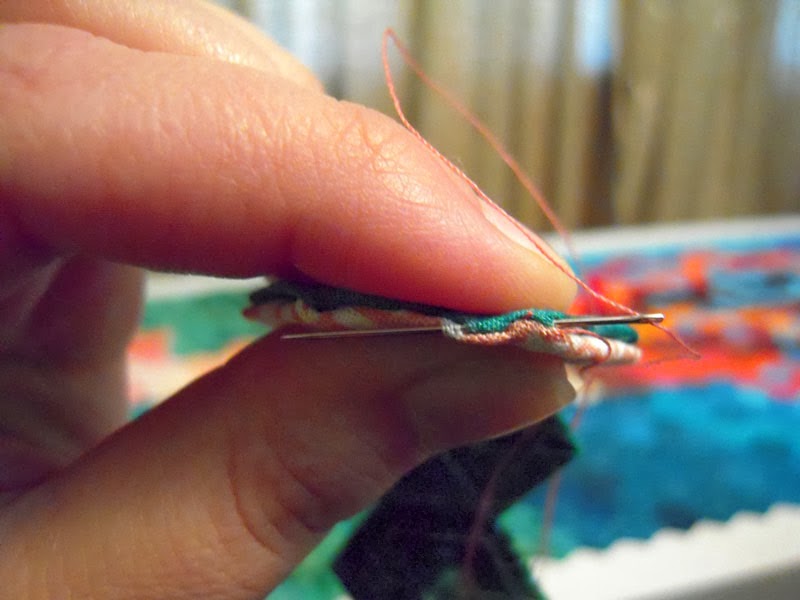
Here is a ‘not so great’ video I quickly made just to show how I sew each one together. I don’t sew through the paper template, just the fabric. The main trick is to make sure the fabric is tight around the paper template each time you make a stitch. Because these are 1/2″ hexies, I only need to sew the corners. The same works for 3/4″ hexies too, but once I get to 1″ or larger, I have to sew through the paper.
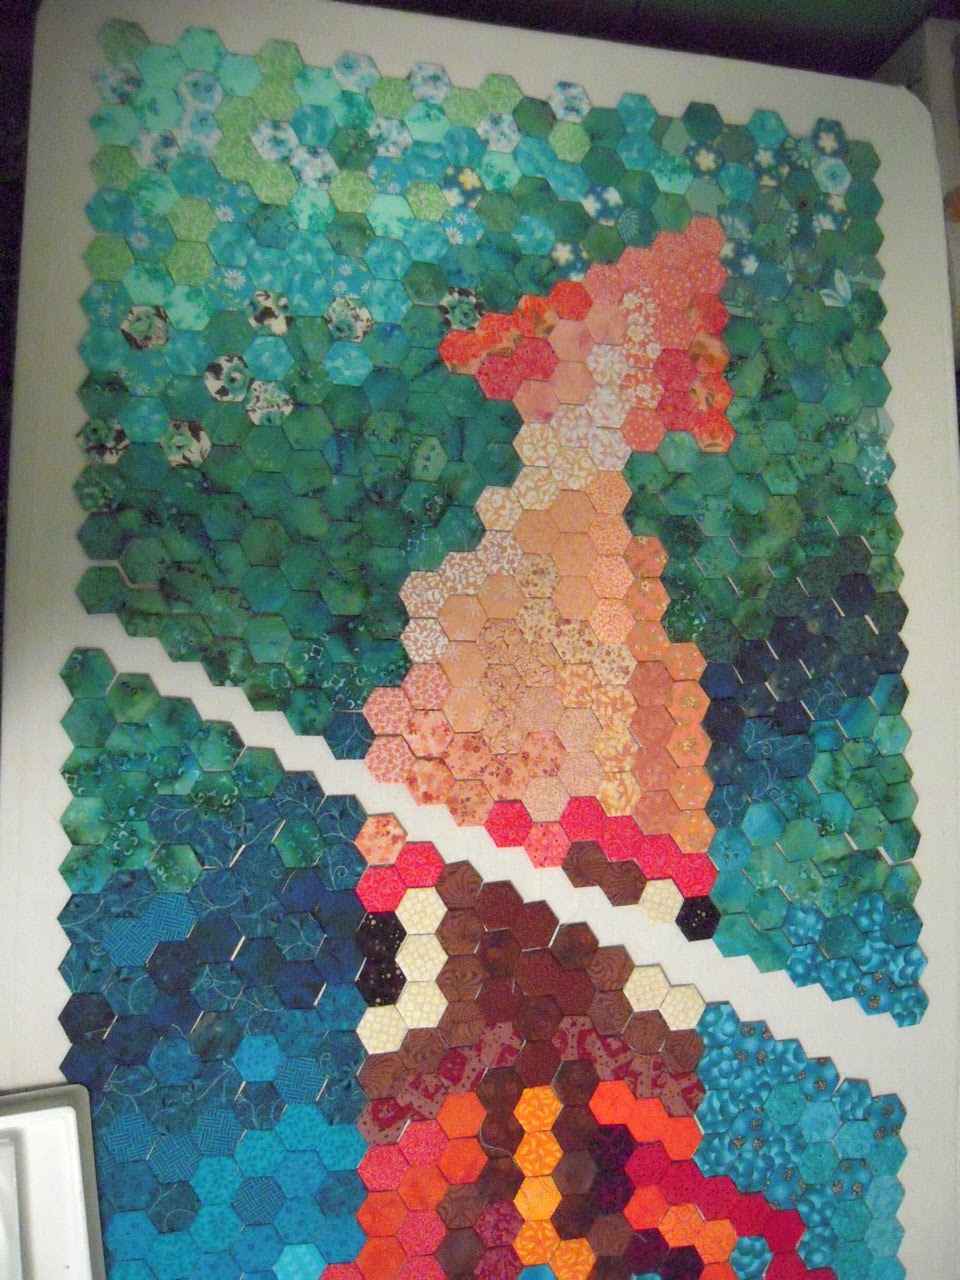
Once I have all my hexies made for a quilt, I lay them all out on the layout board I discussed earlier. This part is super fun, but I can become obsessive with finding just the right spot for each hexie. By laying them out before sewing, you have full control of how the design will look before stitching them all together.
Sewing rows
When the hexie pattern is complete on the layout board, I pick a diagonal row to start stitching together. Here in the squid quilt, you can see the row I was working on because it’s missing.
To stitch the hexies up into rows, I start with two hexies WRONG sides together. Using a ladder stitch, I start from the center, work to one side, then the other, then back to the center to tie a knot and secure it before moving onto the next hexie in the row.
How did I keep my pieces straight to know exactly how to sew them together?
I made a “tool”: I used a 2″ wide x 18″ strip of batting to carefully set my row of hexies on in the order they were to be stitched, then I covered that with a 1.5″ wide x 18″ piece of fabric. Then, starting from the furthest hexie, roll it up. As you open your “roll” for work, it should start with the next hexie in the design.
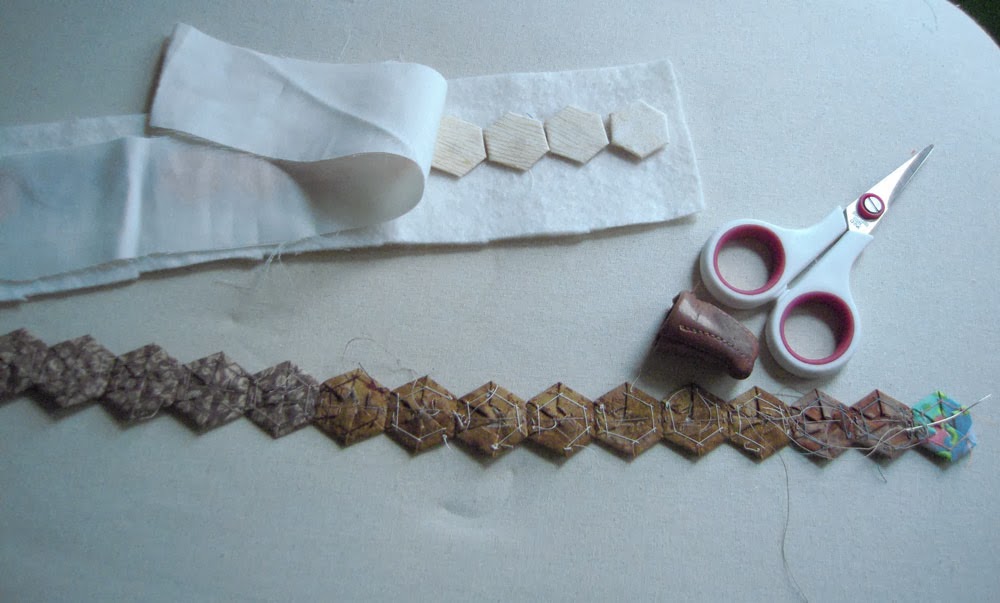
I stick the roll in a little plastic container with the batting on the bottom and carefully pull the batting as you need hexies, they will pop out like a little Pez dispenser, and you can roll the “used” batting under the other side as you go. I may need to make a little video for this at some point too!
Sewing these strips takes some time, as they are finished I put them back on the layout board and keep going. In this photo, you can see the middle strips are sewn. You WILL need a thimble for this work, and even still I ended up with a nice callous on a couple fingers.
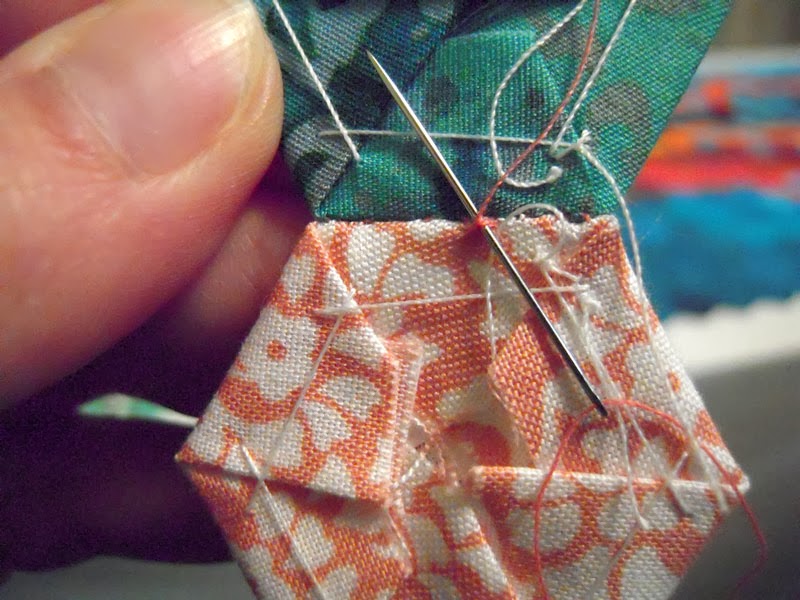
Sewing rows together
The last bit is to sew these rows of hexies together. I personally found that it worked best (for me) to lay the piece flat and whip stitch together making knots at every corner point. Here is a picture of the seams on the back of the dragon quilt before I took out the basting and papers.
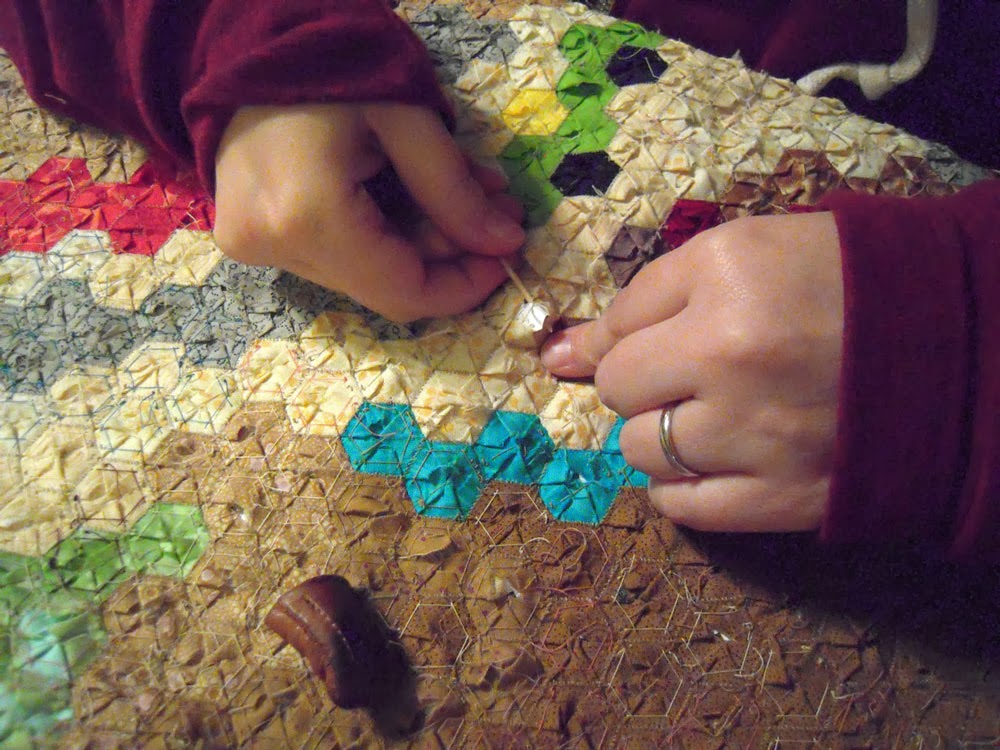
When all the rows are stitched up, you can take out all the papers. First I go over the whole quilt snipping the basting on each hexie, I leave the thread in place. Then I use a toothpick and “grab” the hexie by the punched hole with the toothpick and just pop them out.
When you’re done you end up with a big pile of hexie papers. On this quilt I also picked out all the basting thread.
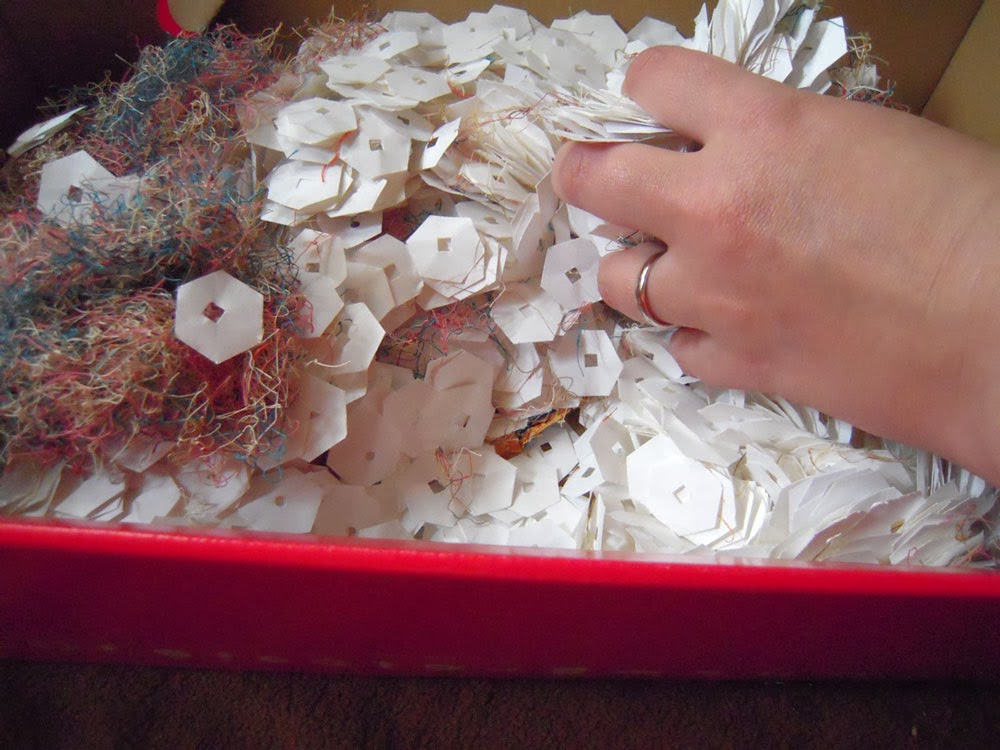
After a little press with the iron, most of these pieces are reusable! Once you get to this point, you need a big pat on the back… maybe even a celebration! It’s the best feeling in the world to finish a project like this… maybe that’s why I’ve started another one 🙂
So that’s about it for the way I make my hexies… how about you? Do you have any fantastic hexie tips to share?
Gail…you are fabulous!! This is hands down the best, most explicit tutorial Ive seen. Im working on a traditional GFG for my first project, the next will be more outside the box so to speak…I can see you are going to make many hexi-addicts!!
I saw a product on another blog using a wash-away interfacing for the templates…I may give it a try for a small project, just to try it out….
You are the bestest, thank you so much for putting your time and love into this!!
Thanks again Karen, it's much harder to explain than to just do it – hope you are enjoying the process of making hexies!
A GREAT tutorial, Gail! And your method of rolling up the hexies to-be-sewn in batting? Brilliant!!
Thanks Dawn, I figured that one out after stitching the squid quilt and having to sit near it while sewing all the time. Being able to take those strips "to go" made all the difference in actually getting it done!
Hola, madre mía. Una maravilla, imaginación y manos al poder!!!!! precioso
Gracias Rosi!