I’ve created a hexie tutorial for All Points Patchwork Blog Hop. As you may know: I’m a hexie addict. So when Diane Gilleland of CraftyPod contacted me about participating in her Mug Rug Blog Hop, I couldn’t say no! She has recently published the book: All Points Patchwork that is chuck full of all sorts of tips and tricks for English Paper Piecing (EPP). She covers everything you can think of… and then some. It’s a great book to add to your quilting library!
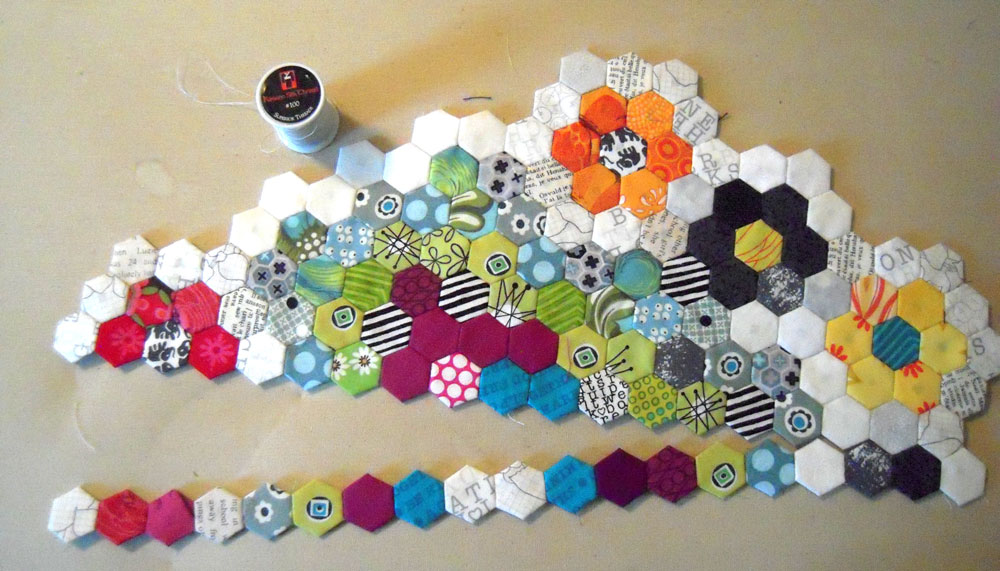
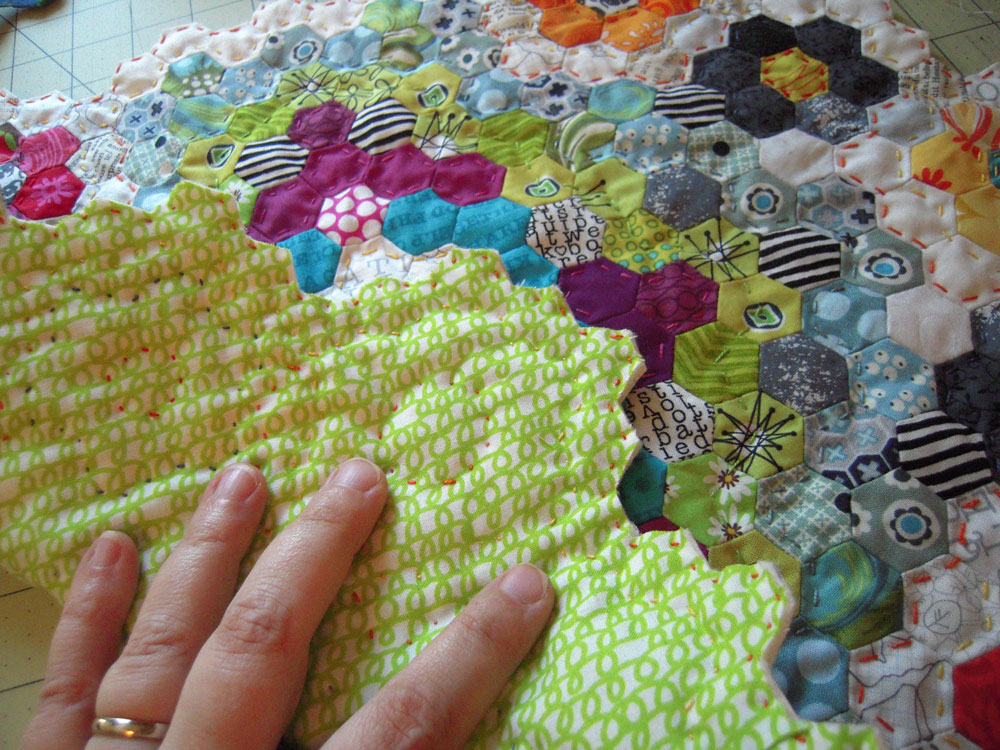
In this post, I’m going to show part of my design process, as well as my stitching process for a EPP hexie placemat. In the near future, I will have a full pattern available for this project – check back soon.I am a very visual person, so the way I design is by trial and error with a physical layout. For this project, I used a card table covered in batting as my “hexie play station”, and really just arranged and re-arranged different hexies until I was happy with a design!

How I Stitch My Hexies
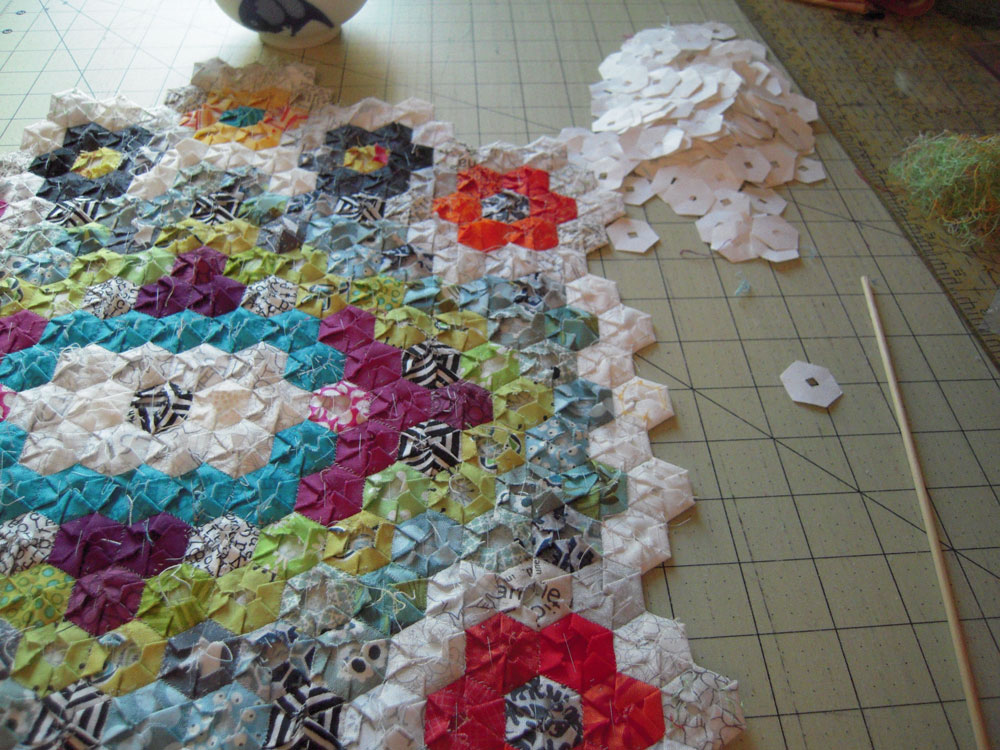
For large quilts, I use a hexie grid over an image of what I want to create, and color in the hexagon shapes accordingly. This abstractly represents the underlying image. Once I have this basic solid-color layout, I baste hexies in those colorways with patterned fabric. I physically lay out each hexie and arrange them until I’m happy. That usually is the hardest part of making a quilt like this.
Once a design is all laid out and I’m happy with each hexie placement, I start sewing my pieces together. Some like to sew these as flowers and piece them that way. However, I like to sew the hexies in rows, then sew the rows together.
Basting Each Hexie
I use both a ladder stitch and a whipstitch. There are some illustrations to show my process. This is just the way I do it – everyone has their own style. In All Points Patchwork on Page 48, Diane explains how she sews these together. On page 200 she describes a ‘skimming whipstitch’ which I use a lot!
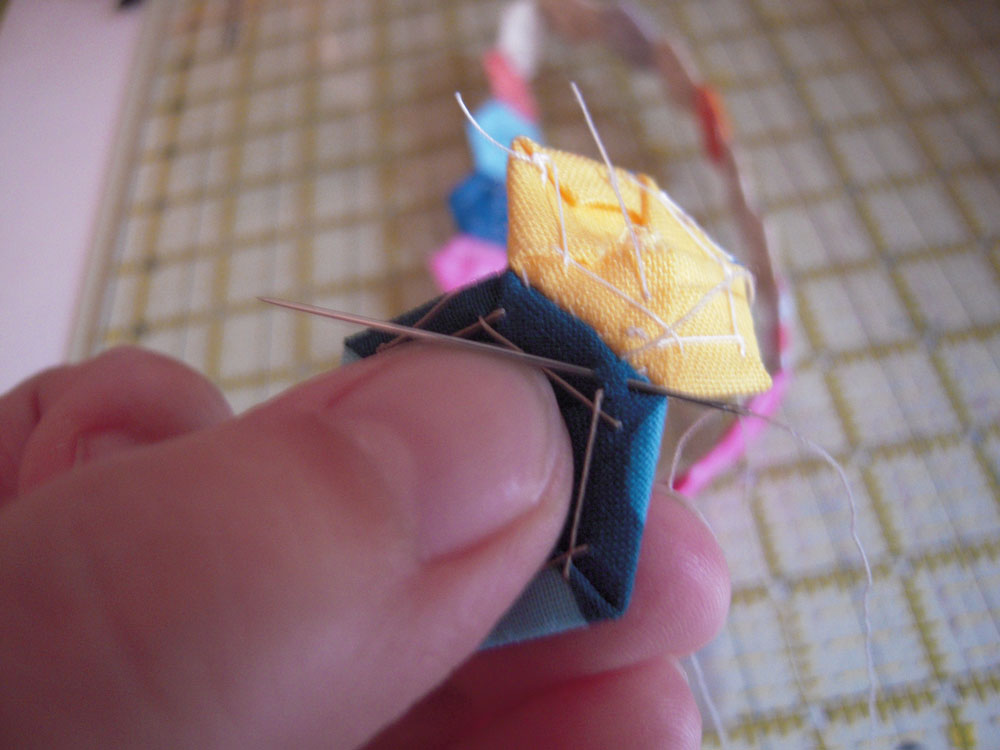
I use either 1/2 inch or 3/4 inch hexie paper templates from PaperPieces.com. This is a small size, and easy for me to manipulate in my hands. I punch a hole in the center of the paper template. Then I fold a small square of fabric around the shape (see illustration below) and use large stitches to baste the fabric onto the paper without stitching through the paper. With larger pieces, you may need to baste through paper.

Once all my hexies are basted, I lay them out on my design board. Then I sew the the basted hexies together into rows using a ladder stitch.
Stitching Hexie Rows
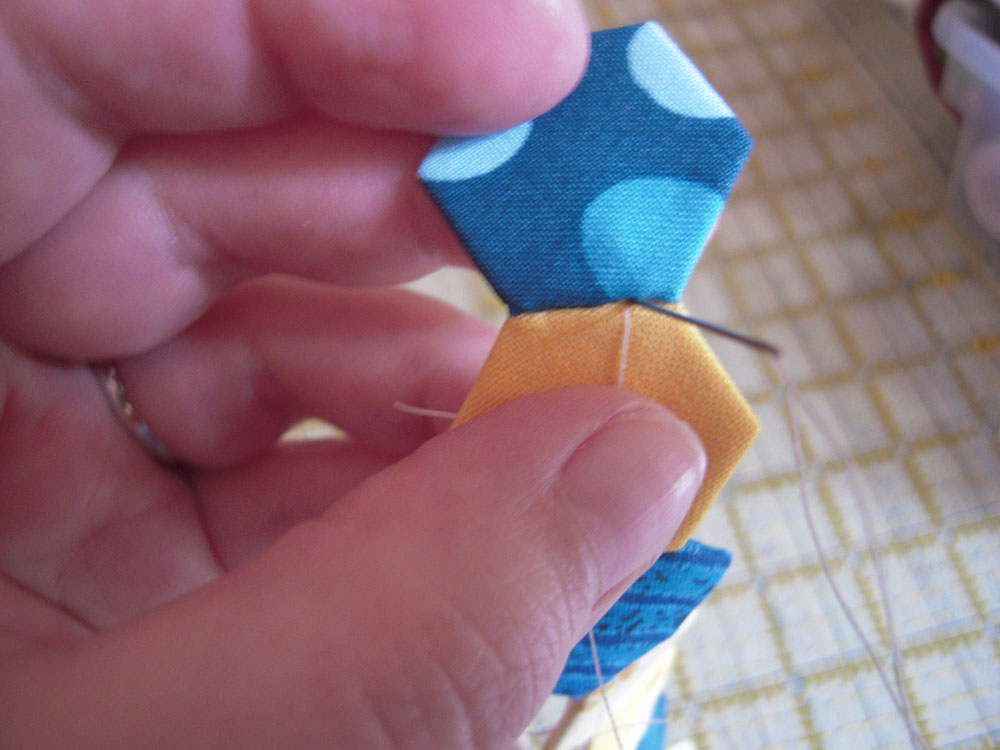
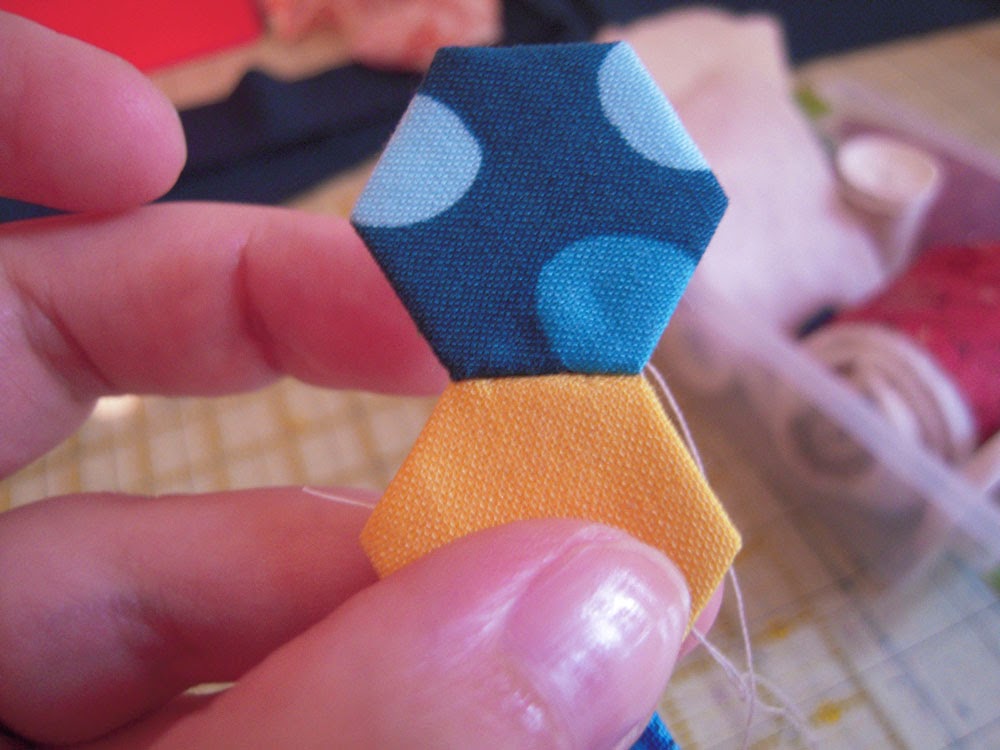
First, bring your threaded needle up under the fabric on the backside of your first hexie, in the center of that side. Then, with WRONG sides together, stitch it to the next hexie in the row using a ladder stitch. Stitch from the center to one side, then back to the other side, then back to the center. This double stitching is great reinforcement.

When finished with the ladder stitch, pass the needle from the front through to the back, without catching any fabric – if you do, that little stitch will show.
I take a small stitch and tie a knot on the backside of the newly added hexie to end that first stitch. Next, run the needle up under the fabric on the next side to be sewn and tie another knot (or cut and tie another knot). From that knot pull your needle up through the center and add another hexie with WRONG sides together and use the running stitch again as before.
Stitching Hexie Rows Together
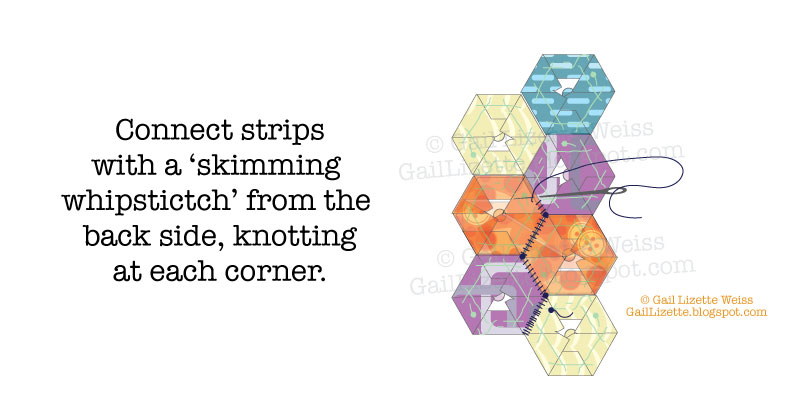
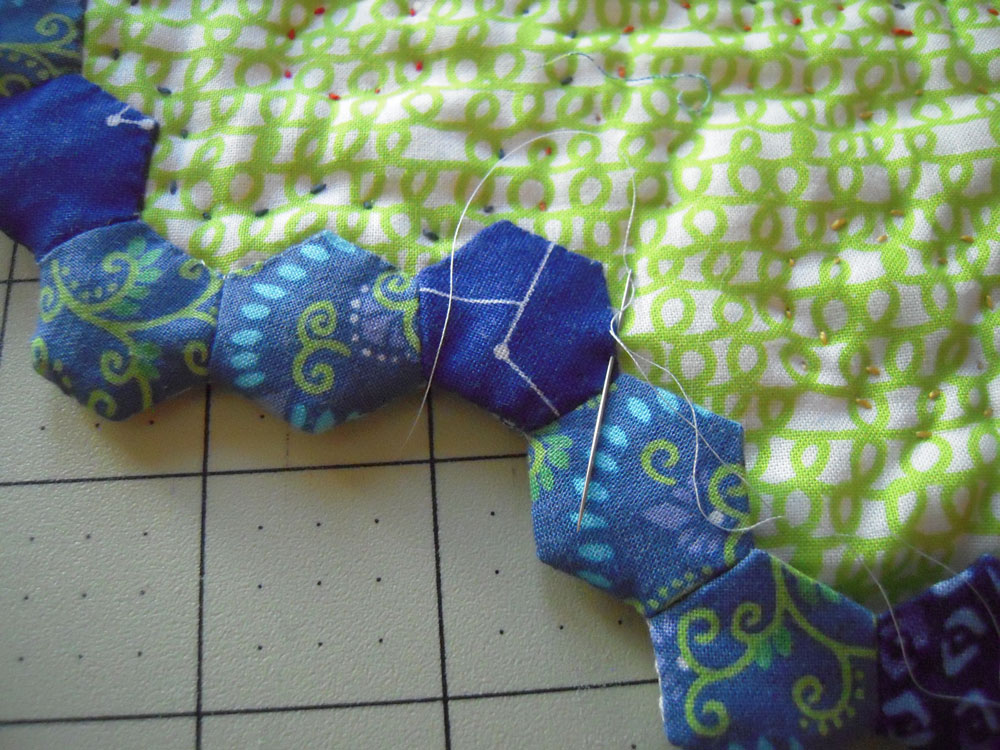
Once all the rows are stitched, you can stitch the rows together. To sew the rows together, I lay them flat next to each other and use a skimming whipstitch from one end to the other, knotting at each corner.
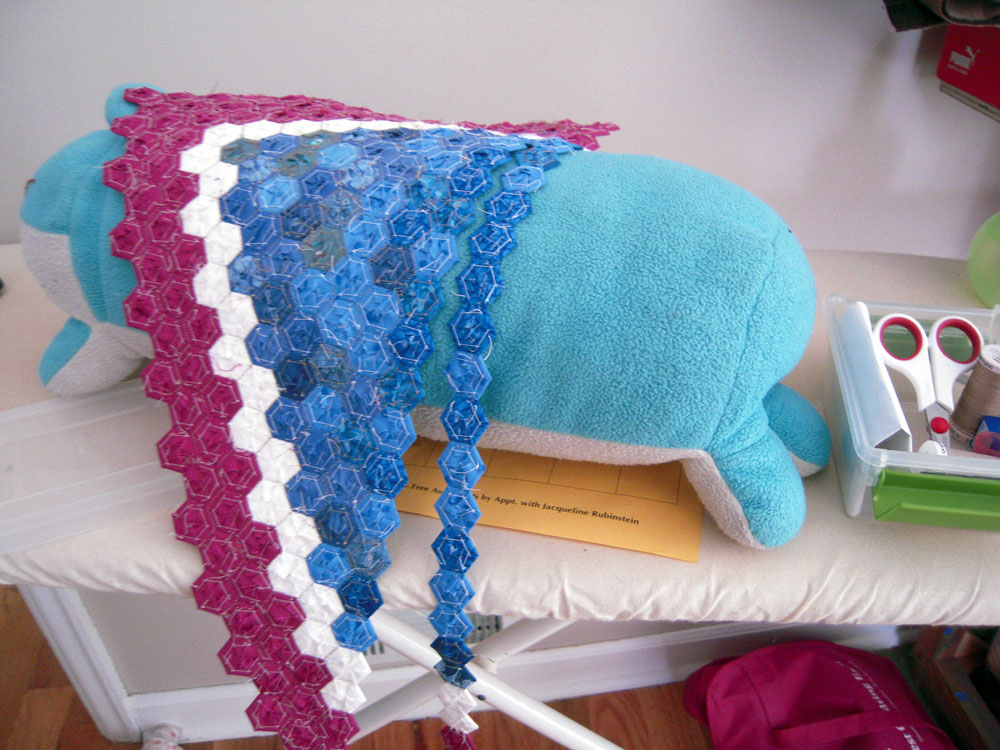
When I am sewing the rows of hexies together, I wrap my project around a bolster pillow to make it easier to work with. Since I’m right-handed I like to hold the strip I’m stitching on the left side using my left hand to hold everything in place while I stitch… I rest my left hand on the bolster.
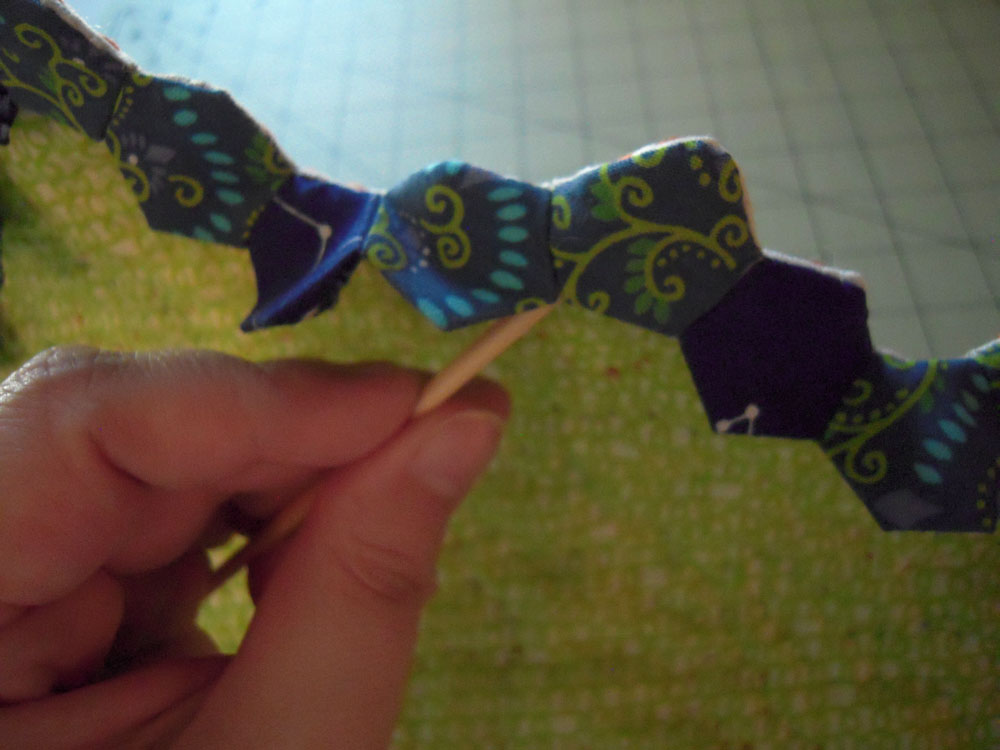
Removing Paper Templates
Once all the pieces are sewn together, it’s time to start thinking about quilting and binding. Also time to pull those papers out! The tools I use for this is a wooden skewer and a seam ripper.
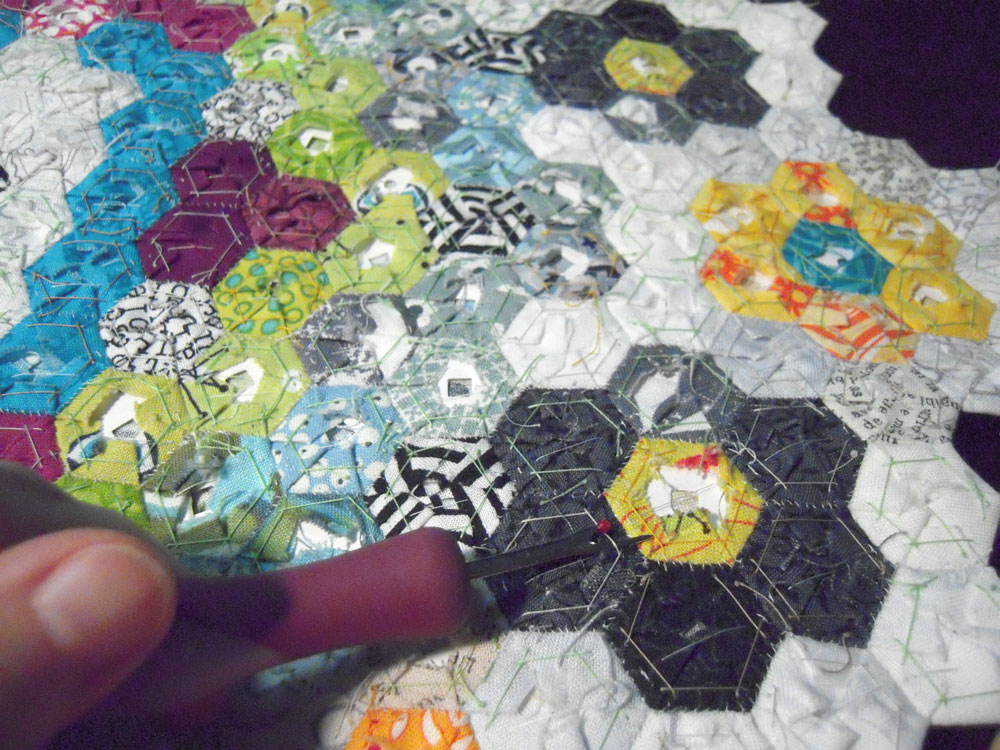
First I snip the basting with the seam ripper.
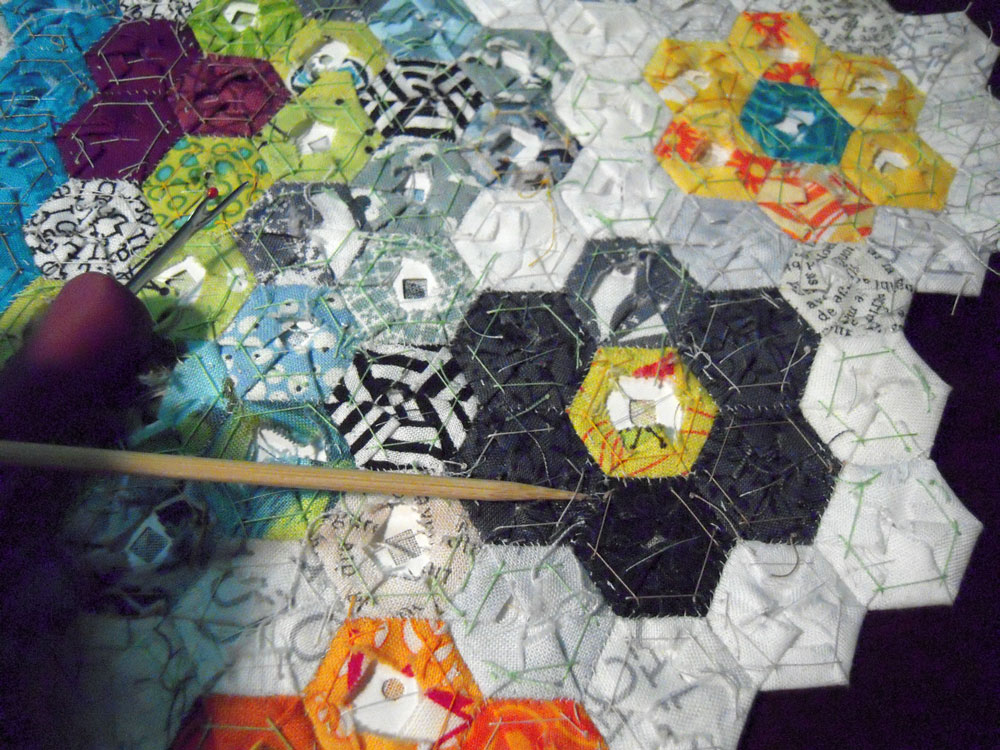
Then I use the skewer to pull out a basting stitch or two. This is when the hole punch in the center of the template comes into play.
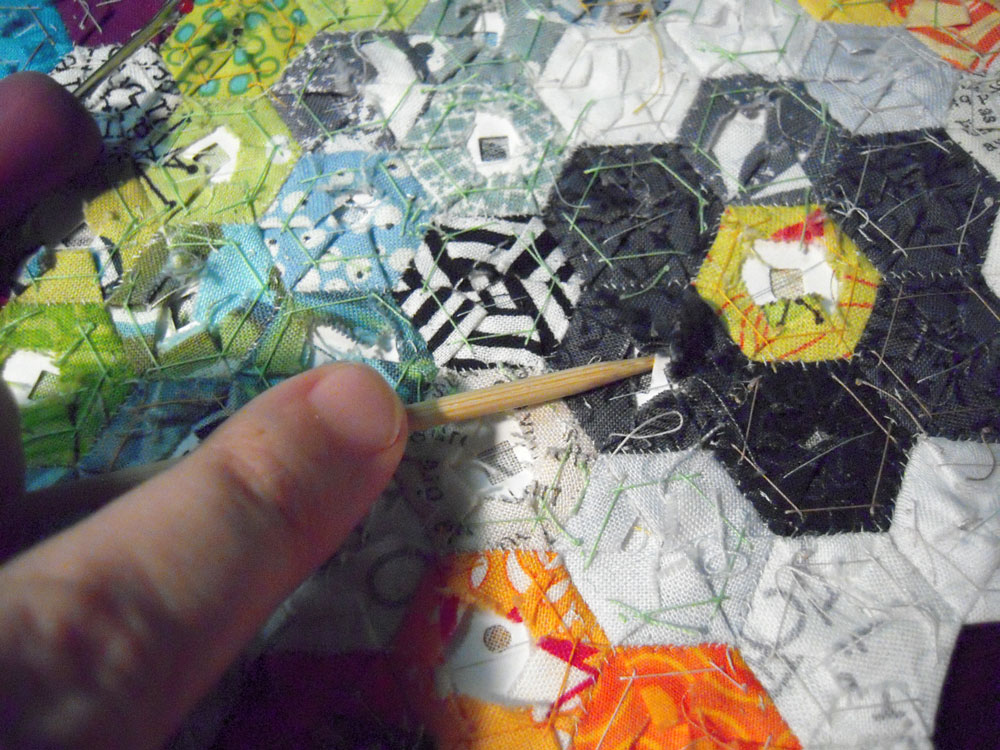
The skewer then goes into the punched hole of the template… and pops right out! You can leave the snipped basting stitch as is, or you can pull the threads out too.
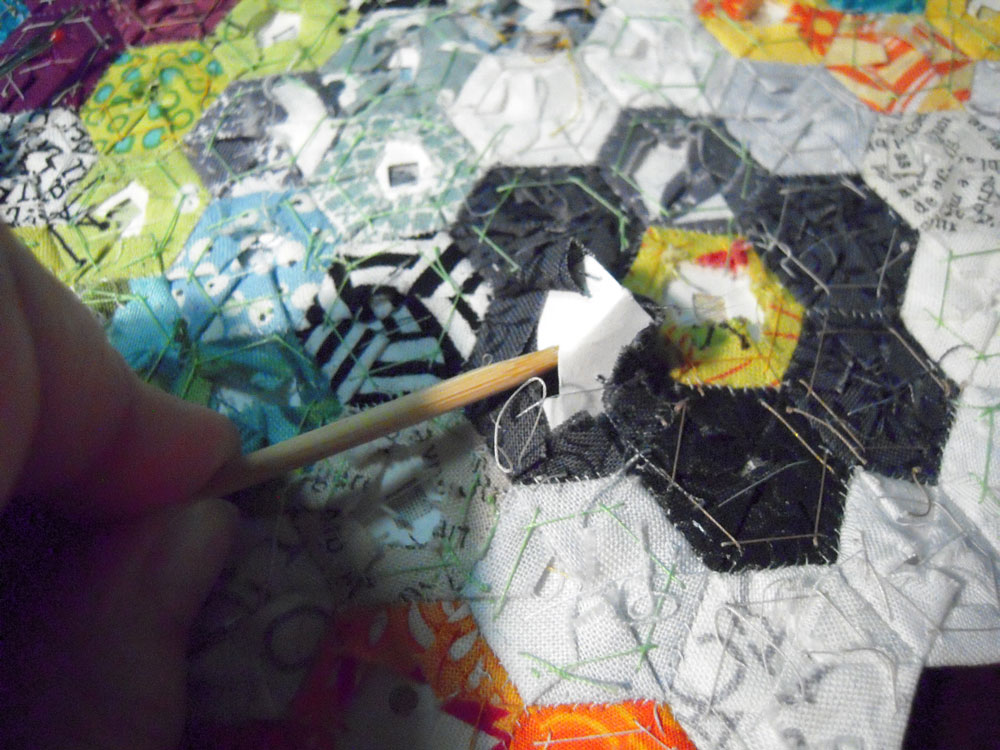
Personally, I like to pull all the threads out – it soothes my OCD tendencies, and I think it looks better! Also, if you pull the threads out, the paper templates stay fairly flat and are reusable after ironing!
Next Step: Quilting
I am currently out of spray baste, and don’t want to buy anymore since I don’t have a good place for glue basting at my house. So lately I’ve been thread-basting by hand. For a small project like this, it took me about 15 minutes. I use Sharon Schamber’s technique described here.
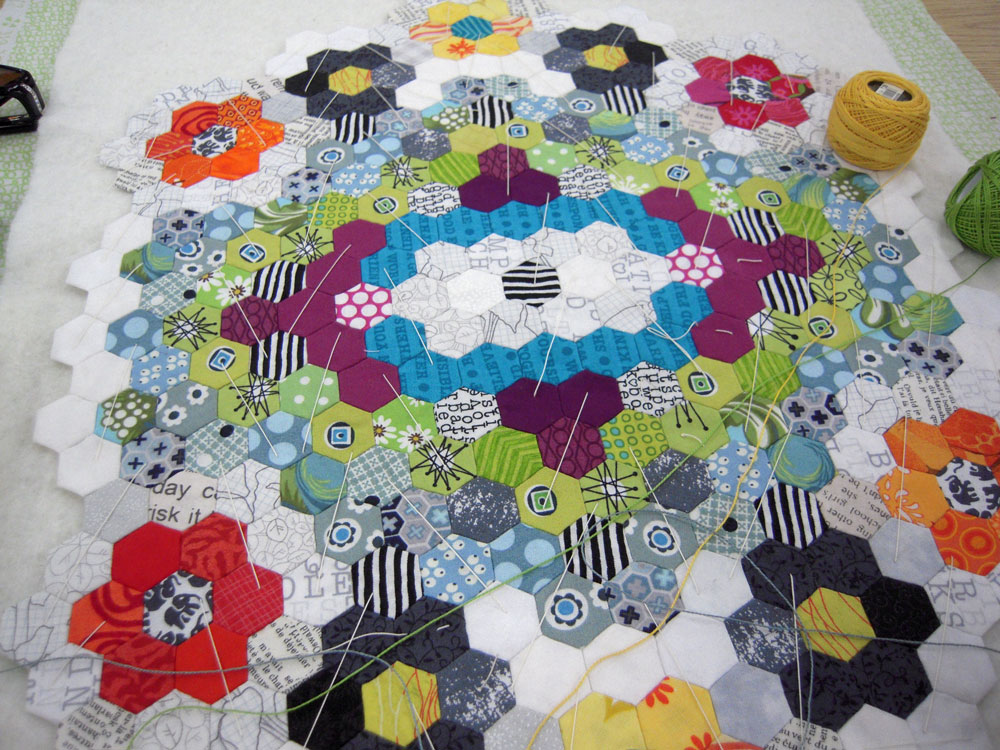
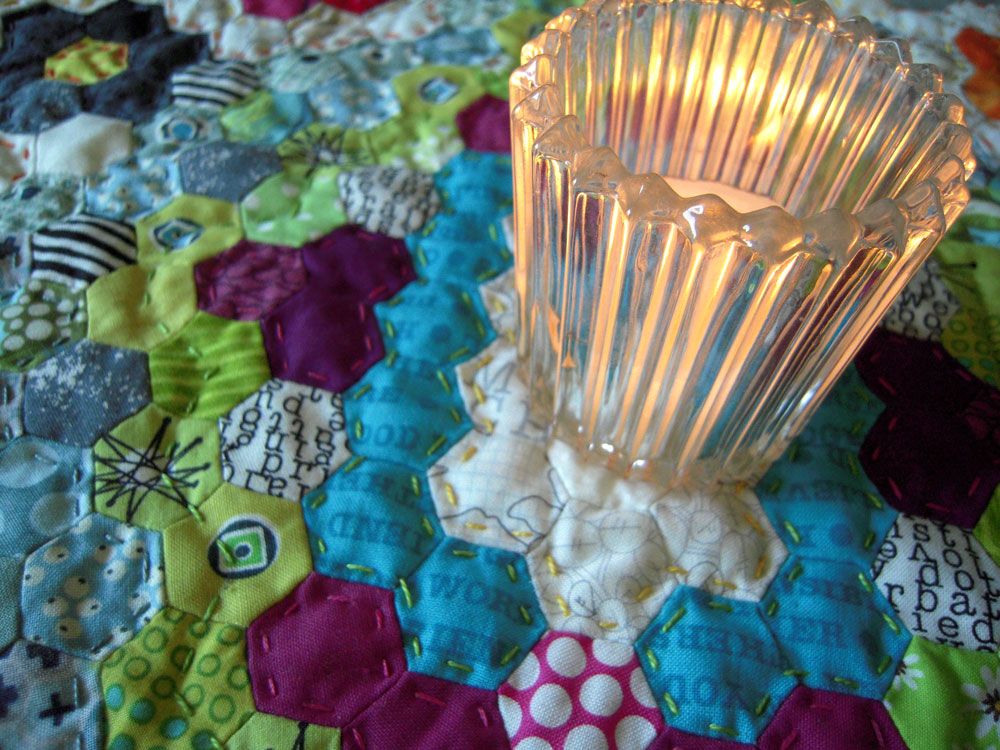
This way of basting is fantastic! It holds everything in place so well, and is very easy to work with compared to pins. It’s how I basted the Jellyfish too. From here I had to do a lot of thinking on how to quilt this! Since the pattern is busy, I decided to go loud and use pretty colored #8 Perle Cotton threads with bigger stitches.
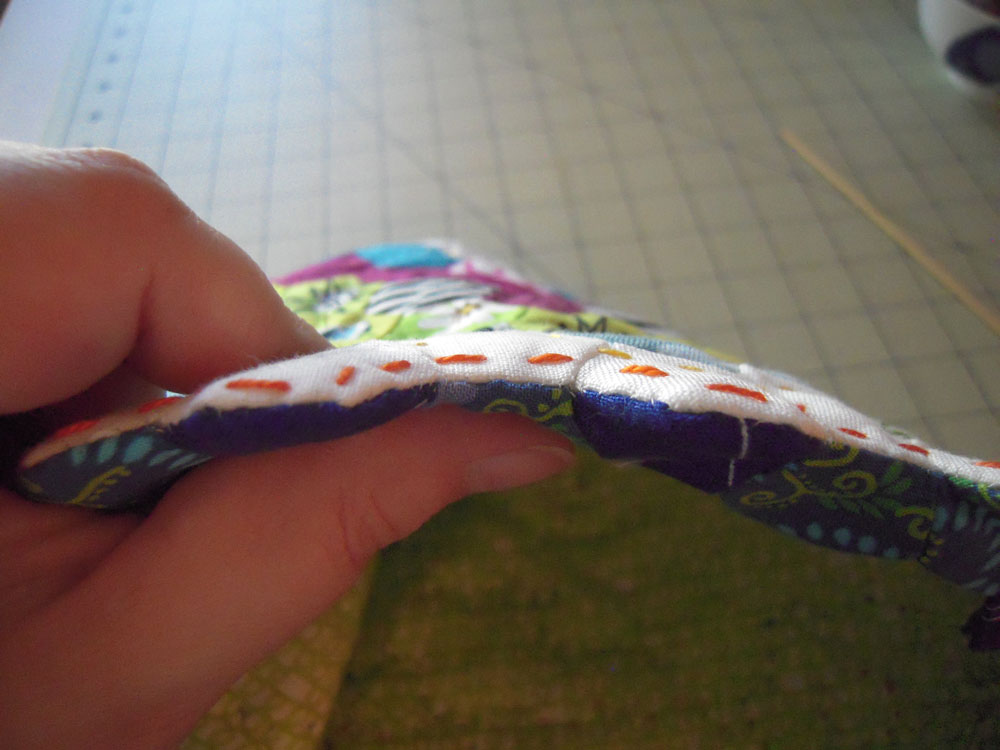
Hexie Binding
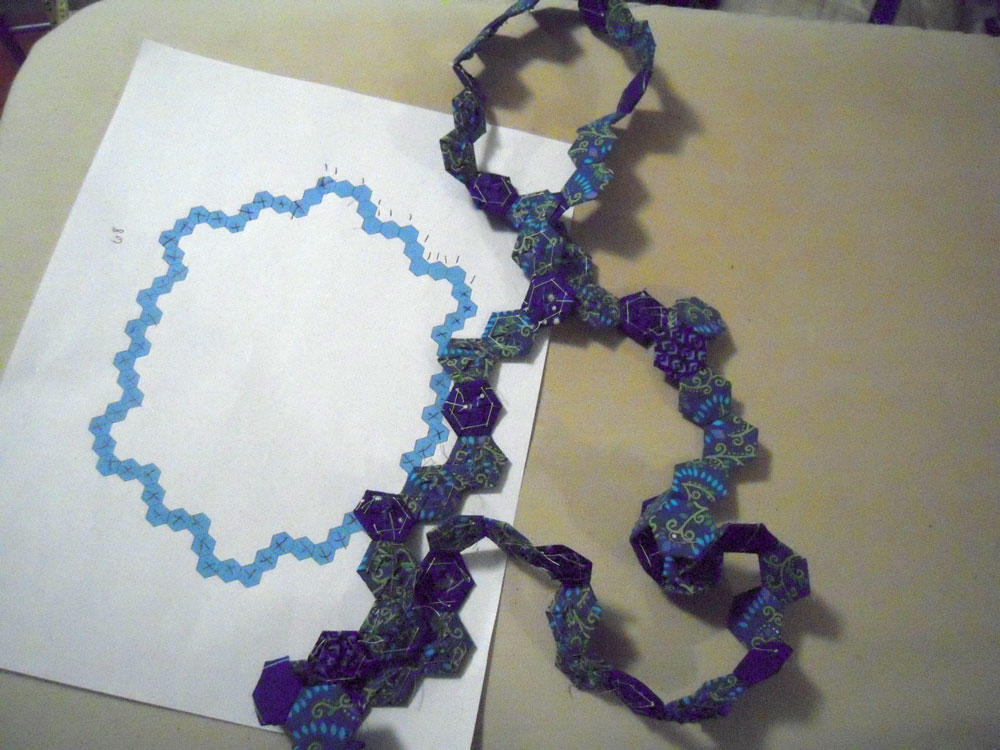
I also made a hexie binding for this project. You just need to make a copy of your project and string together hexies to make the shape of it. I needed a printout to mark off as I stitched so I put the hexies together correctly… and still made a few mistakes!
Once the binding was complete, I pulled the papers out and pressed with starch to keep the folds as crisp as possible.
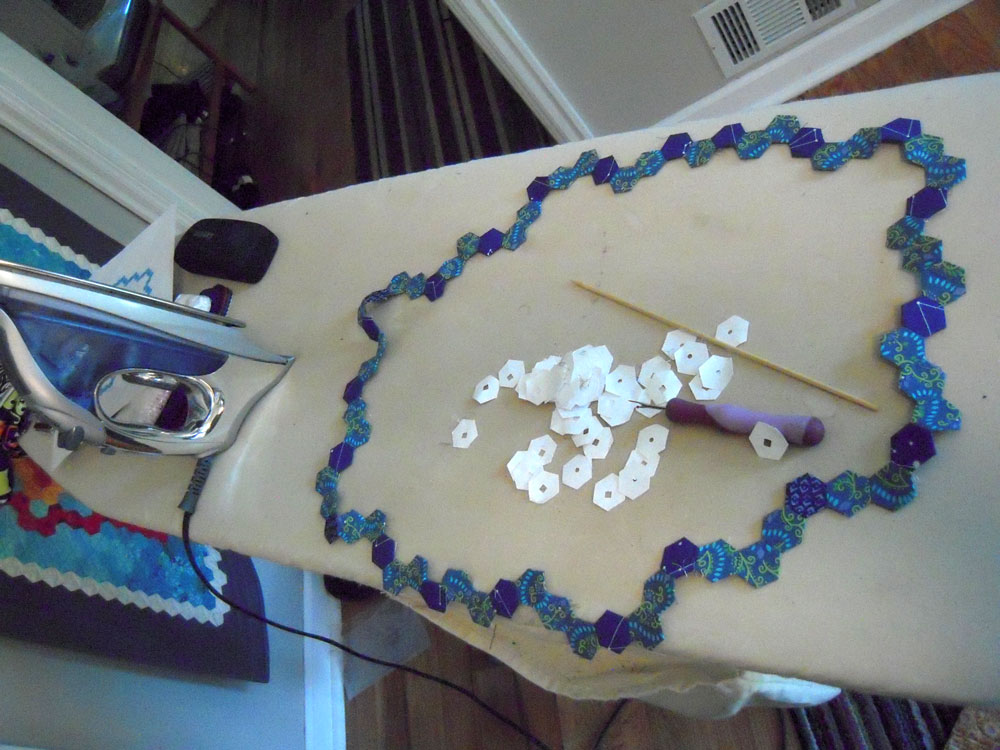
In hind-sight, I think I would leave the papers in until the binding is stitched onto the front. It would make it easier to stitch! But this was my first attempt at a hexie binding and I’m learning as I go!
Before I could stitch the binding on, I had to very carefully trim out the extra batting and backing. Take your time here – a wrong move could go South quickly! After trimming it up, I pinned the binding (right sides together) to the front.
I stitched all around the edges, making sure to avoid catching any batting or backing… and I also tried to take small stitches. Sometimes I back-tracked to make sure there were no large gaps in my stitching. When it was sewed onto the front, I turned the binding to the back and used my skewer again to pull the points on the hexie shapes.
I then double checked my stitching around the edges.
And lastly I stitched the binding down on the backside to finish.
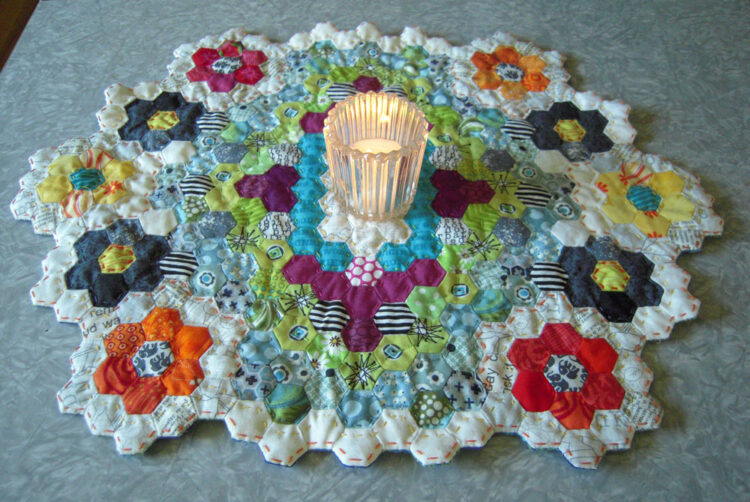
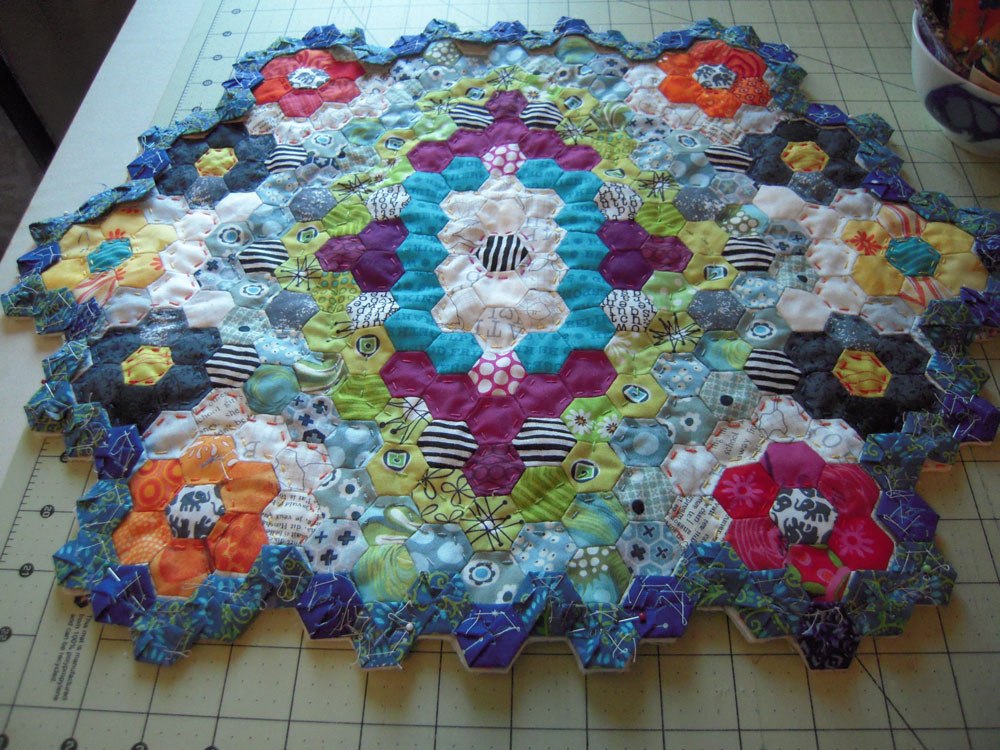
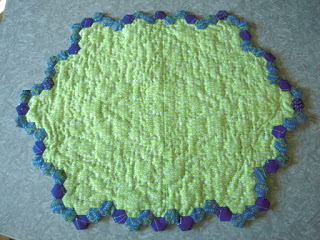
Finished Quilt
Voila! My completed Hexie Placemat is ready for use! There are 324 pieces in the front, plus another 68 pieces for the binding, for a total of 392 hexies in this project.

The final measurement of this placemat is 15″ x 19″ using 1/2″ hexies. For a larger quilt, you could use 2″ hexies for this pattern, and make a 60″ x 77″ quilt! I will have this pattern available soon with step by step illustrations and hexie graph paper too.
For amazing instructional photos and information on paper piecing, check out All Points Patchwork by Diane Gilleland. Her step by step approach makes it easy for anyone to jump in on the hexie train!

For even more inspiration and information, check out the other stops on this Mug Rug Bloghop:
Monday, 9/14: Hanna Andersson, http://www.ihanna.nu/
Tuesday, 9/15: Maryline Collioud Robert, http://www.maryandpatch.blogspot.com
Weds, 9/16: Gail Lizette Weiss. You’re here!
Thurs, 9/17: Ula P, http://www.luluandceleste.com
Friday, 9/18: Caroline Heinrichs, http://www.goodearthquilting.blogspot.ca